
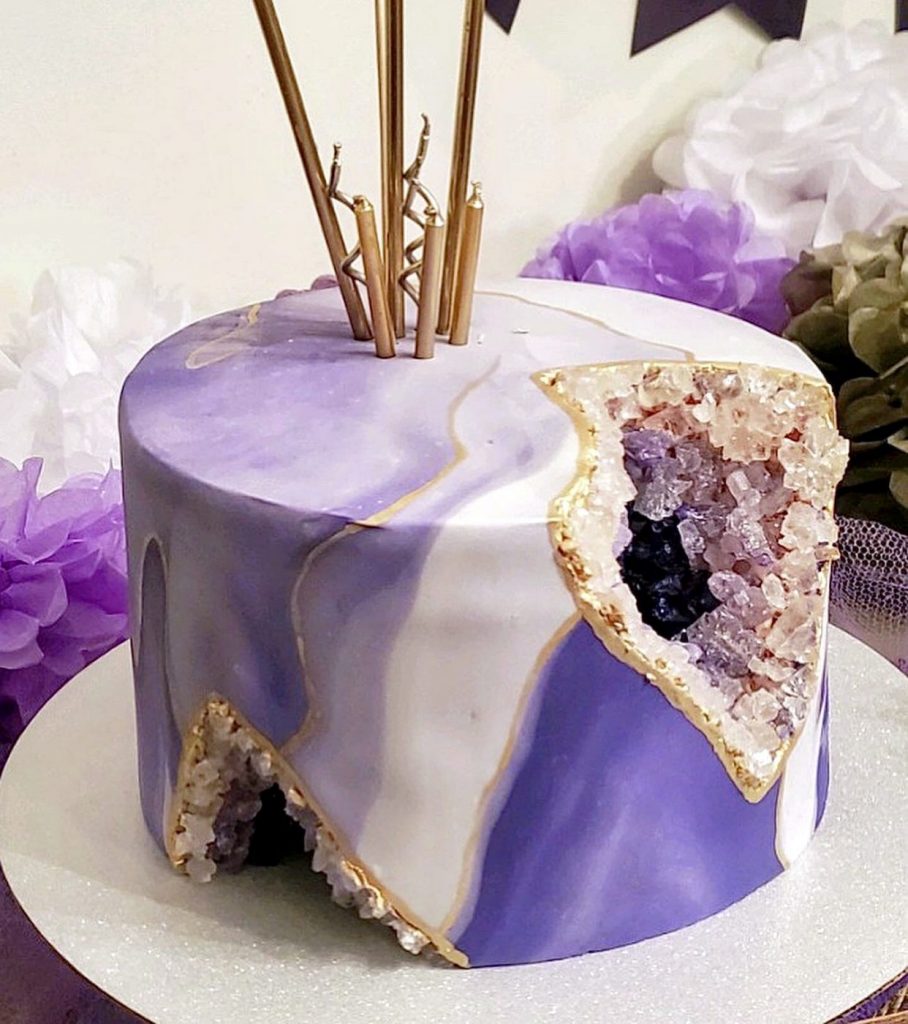
Geode cakes have been a highly popular trend in the cake industry for a considerable amount of time. There are numerous designs that you can create using this trend. If you’re a fan of geodes and cakes, then the thought of combining them together would be even more exciting.
In this tutorial, we’ll show you the easiest way to make a geode cake, which is simpler than you may think. To make a geode cake, you will require certain materials such as fondant, cake layers, rock candy, and more. Follow our step-by-step guide to create your very own stunning geode cake.
Items Needed:
- Rock Candy (gradient colors)
- Carving Tool
- Fondant
- Edible Metallic Paint
- Cake Turntable
- Cake Smoothers
- Cake Carving Knife
- Frosting
- Three Layered Cake
- Thin Paint brush
Step 1: Leveling Cake Layers
If you want your cake to have sharp edges and flat surfaces, it all begins with properly leveling each cake layer. In addition to leveling the cake layers, it’s also important to stack each layer on top of the other once they have been leveled and then start smoothing out the surface around the cake.
By doing so, you can ensure a smooth surface for decorating the cake. To learn more tips and tricks for successfully leveling a cake, check out our blog post “Mastering the Art of Stacking, Filling, and Layering a Cake.” Our post provides valuable tips and techniques to help you achieve professional-looking cakes every time.
Step 2: Crumb Coating the Cake
After achieving a flat surface around and on top of the cake, the next step is to apply a crumb coat to the cake. It’s recommended to place the cake into the refrigerator to allow the crumb coat to crust over for at least 30 minutes. Although it may seem unnecessary, taking the time to allow the crumb coat to set will help to provide a firm surface when adding fondant to your cake.
This is important because if the surface is too soft, it can cause the cake to slide back and forth as you’re trying to smooth out the fondant, potentially causing the cake to lean to one side. Therefore, it’s crucial to give yourself a 30-minute break by letting the cake crust over to ensure a stable surface for decorating the cake.
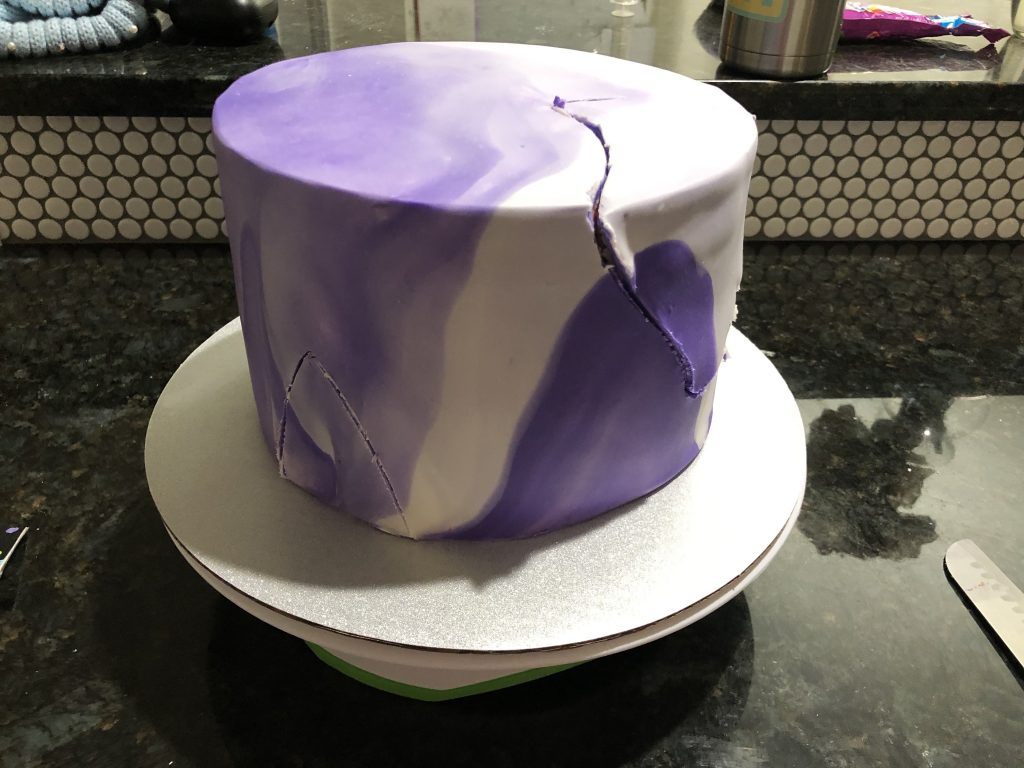
Step 3: Adding Fondant to the Cake
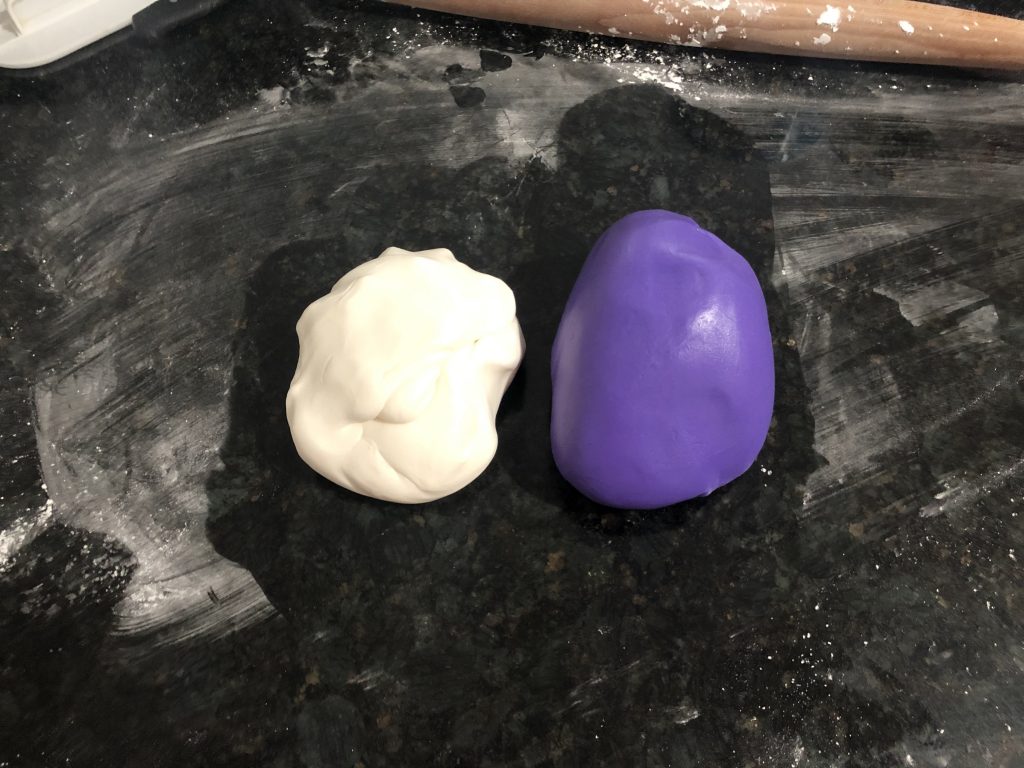
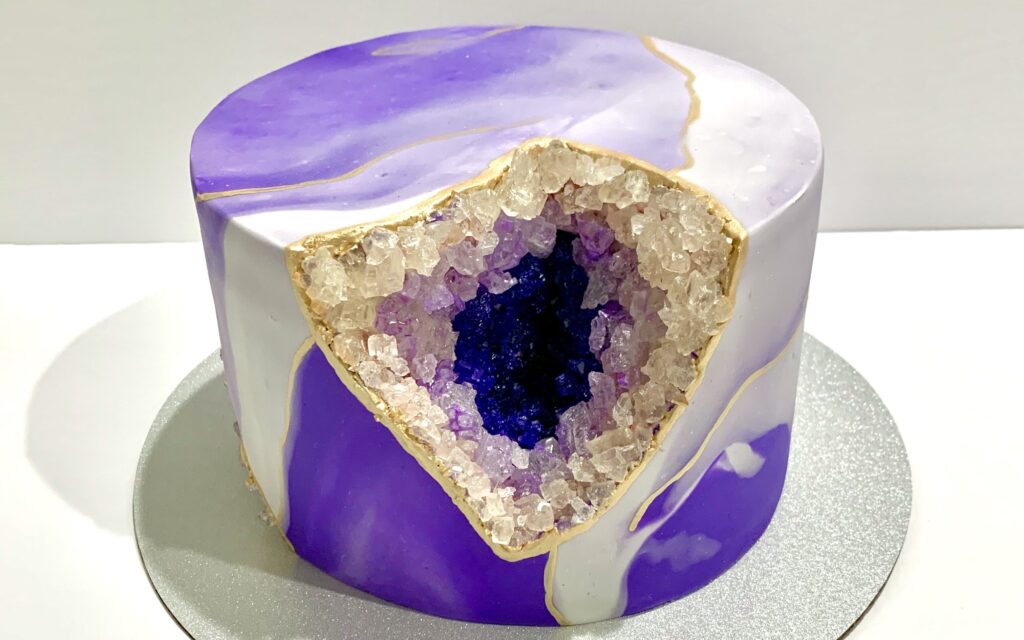
If you want to create a two-toned fondant, start by placing one color on top of the other, then twist them together.
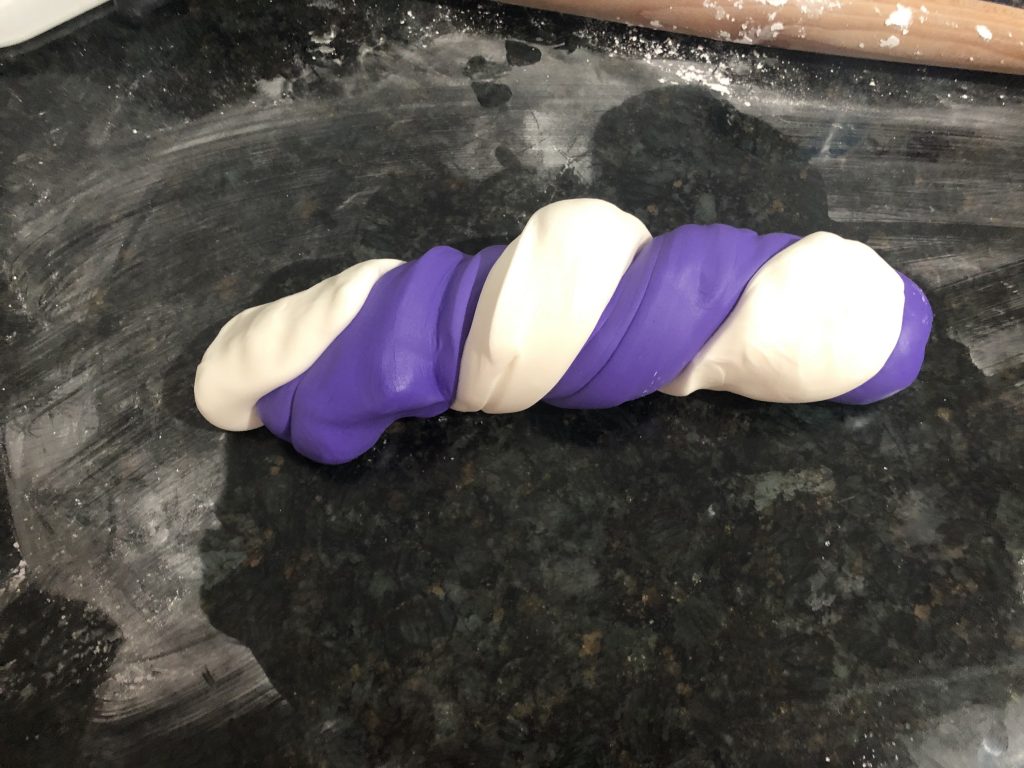
After twisting, roll the fondant into the shape of the cake that you’re covering, being careful not to overwork the fondant. Over-mixing can cause the fondant to turn into one solid color instead of the desired three shades, such as dark purple, light purple, and white.
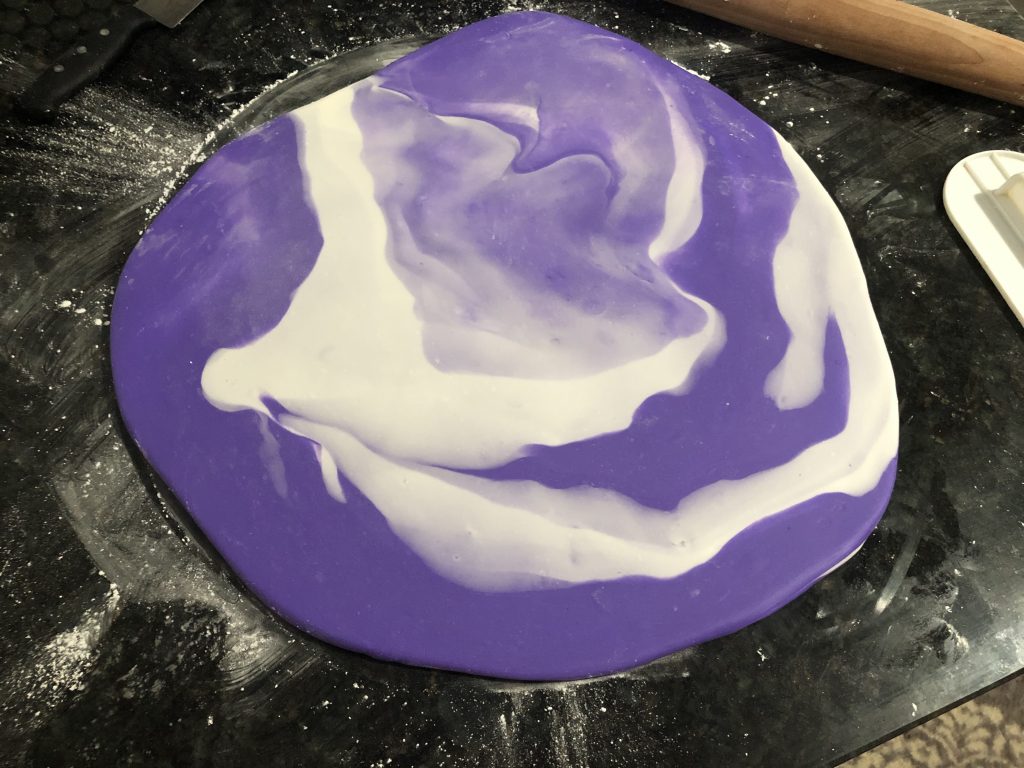
To ensure a perfect two-toned effect, twist the fondant just enough to create a marbled effect, then roll it into the desired shape. By following these simple steps, you can create a beautiful, unique look for your cake that will impress your guests. For more tips and tricks on working with fondant, check out our blog post “Mastering Fondant: Tips and Techniques for Cake Decorating.
Step 4: Carving into the Cake
The next step in creating your rock candy cake is to carve out a section of the cake.
It’s up to you where you would like to place the rock candy on the cake, but for this tutorial, we decided to carve out two sections on the top and bottom of the cake.
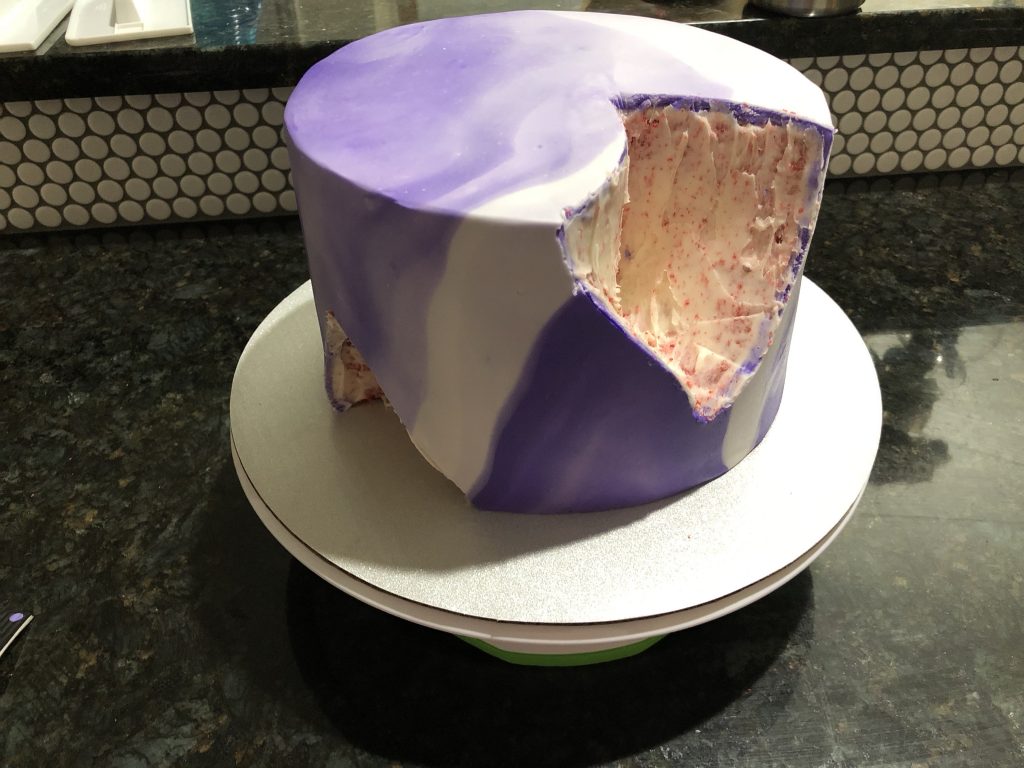
While carving, it’s important to make sure the surface is flat on the inside or center of the section that is carved out. Once you’ve carved out the section, add a layer of buttercream to the exterior of the carved-out section.

This will help the rock candy stick to the cake and stay in place.
Step 5: Adding The Rock Candy
Adding rock candy to your geode cake is one of the easiest steps in the decorating process. The rock candy can be purchased from Party City, Hobby Lobby, or even Amazon.
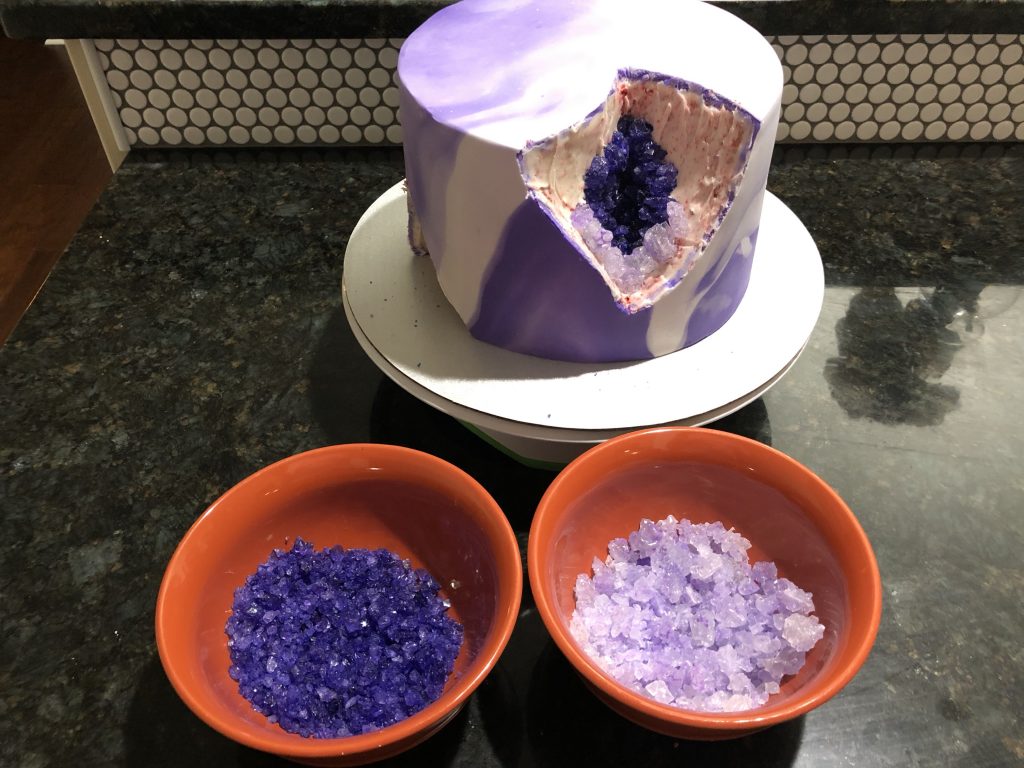
To remove the rock candy from the stick, simply take a large metal spoon and tap the rock candy while it’s still in the original packaging.
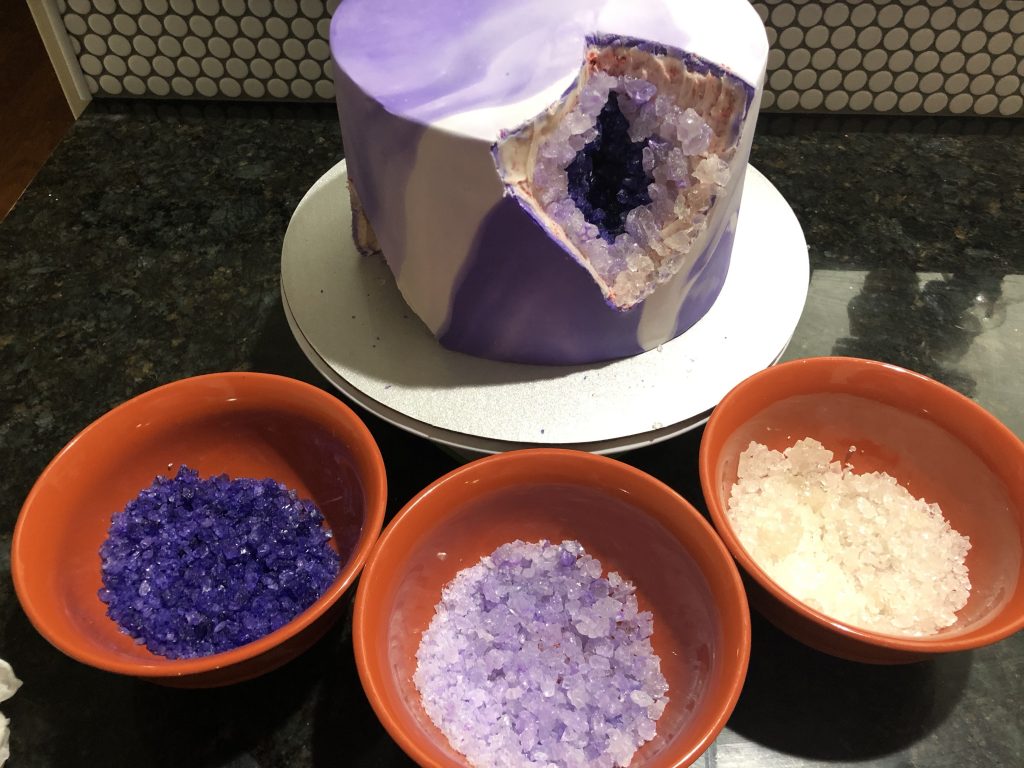
The rock candy will start to fall off the stick. Alternatively, you can also remove the rock candy from the stick by breaking it with your hands.
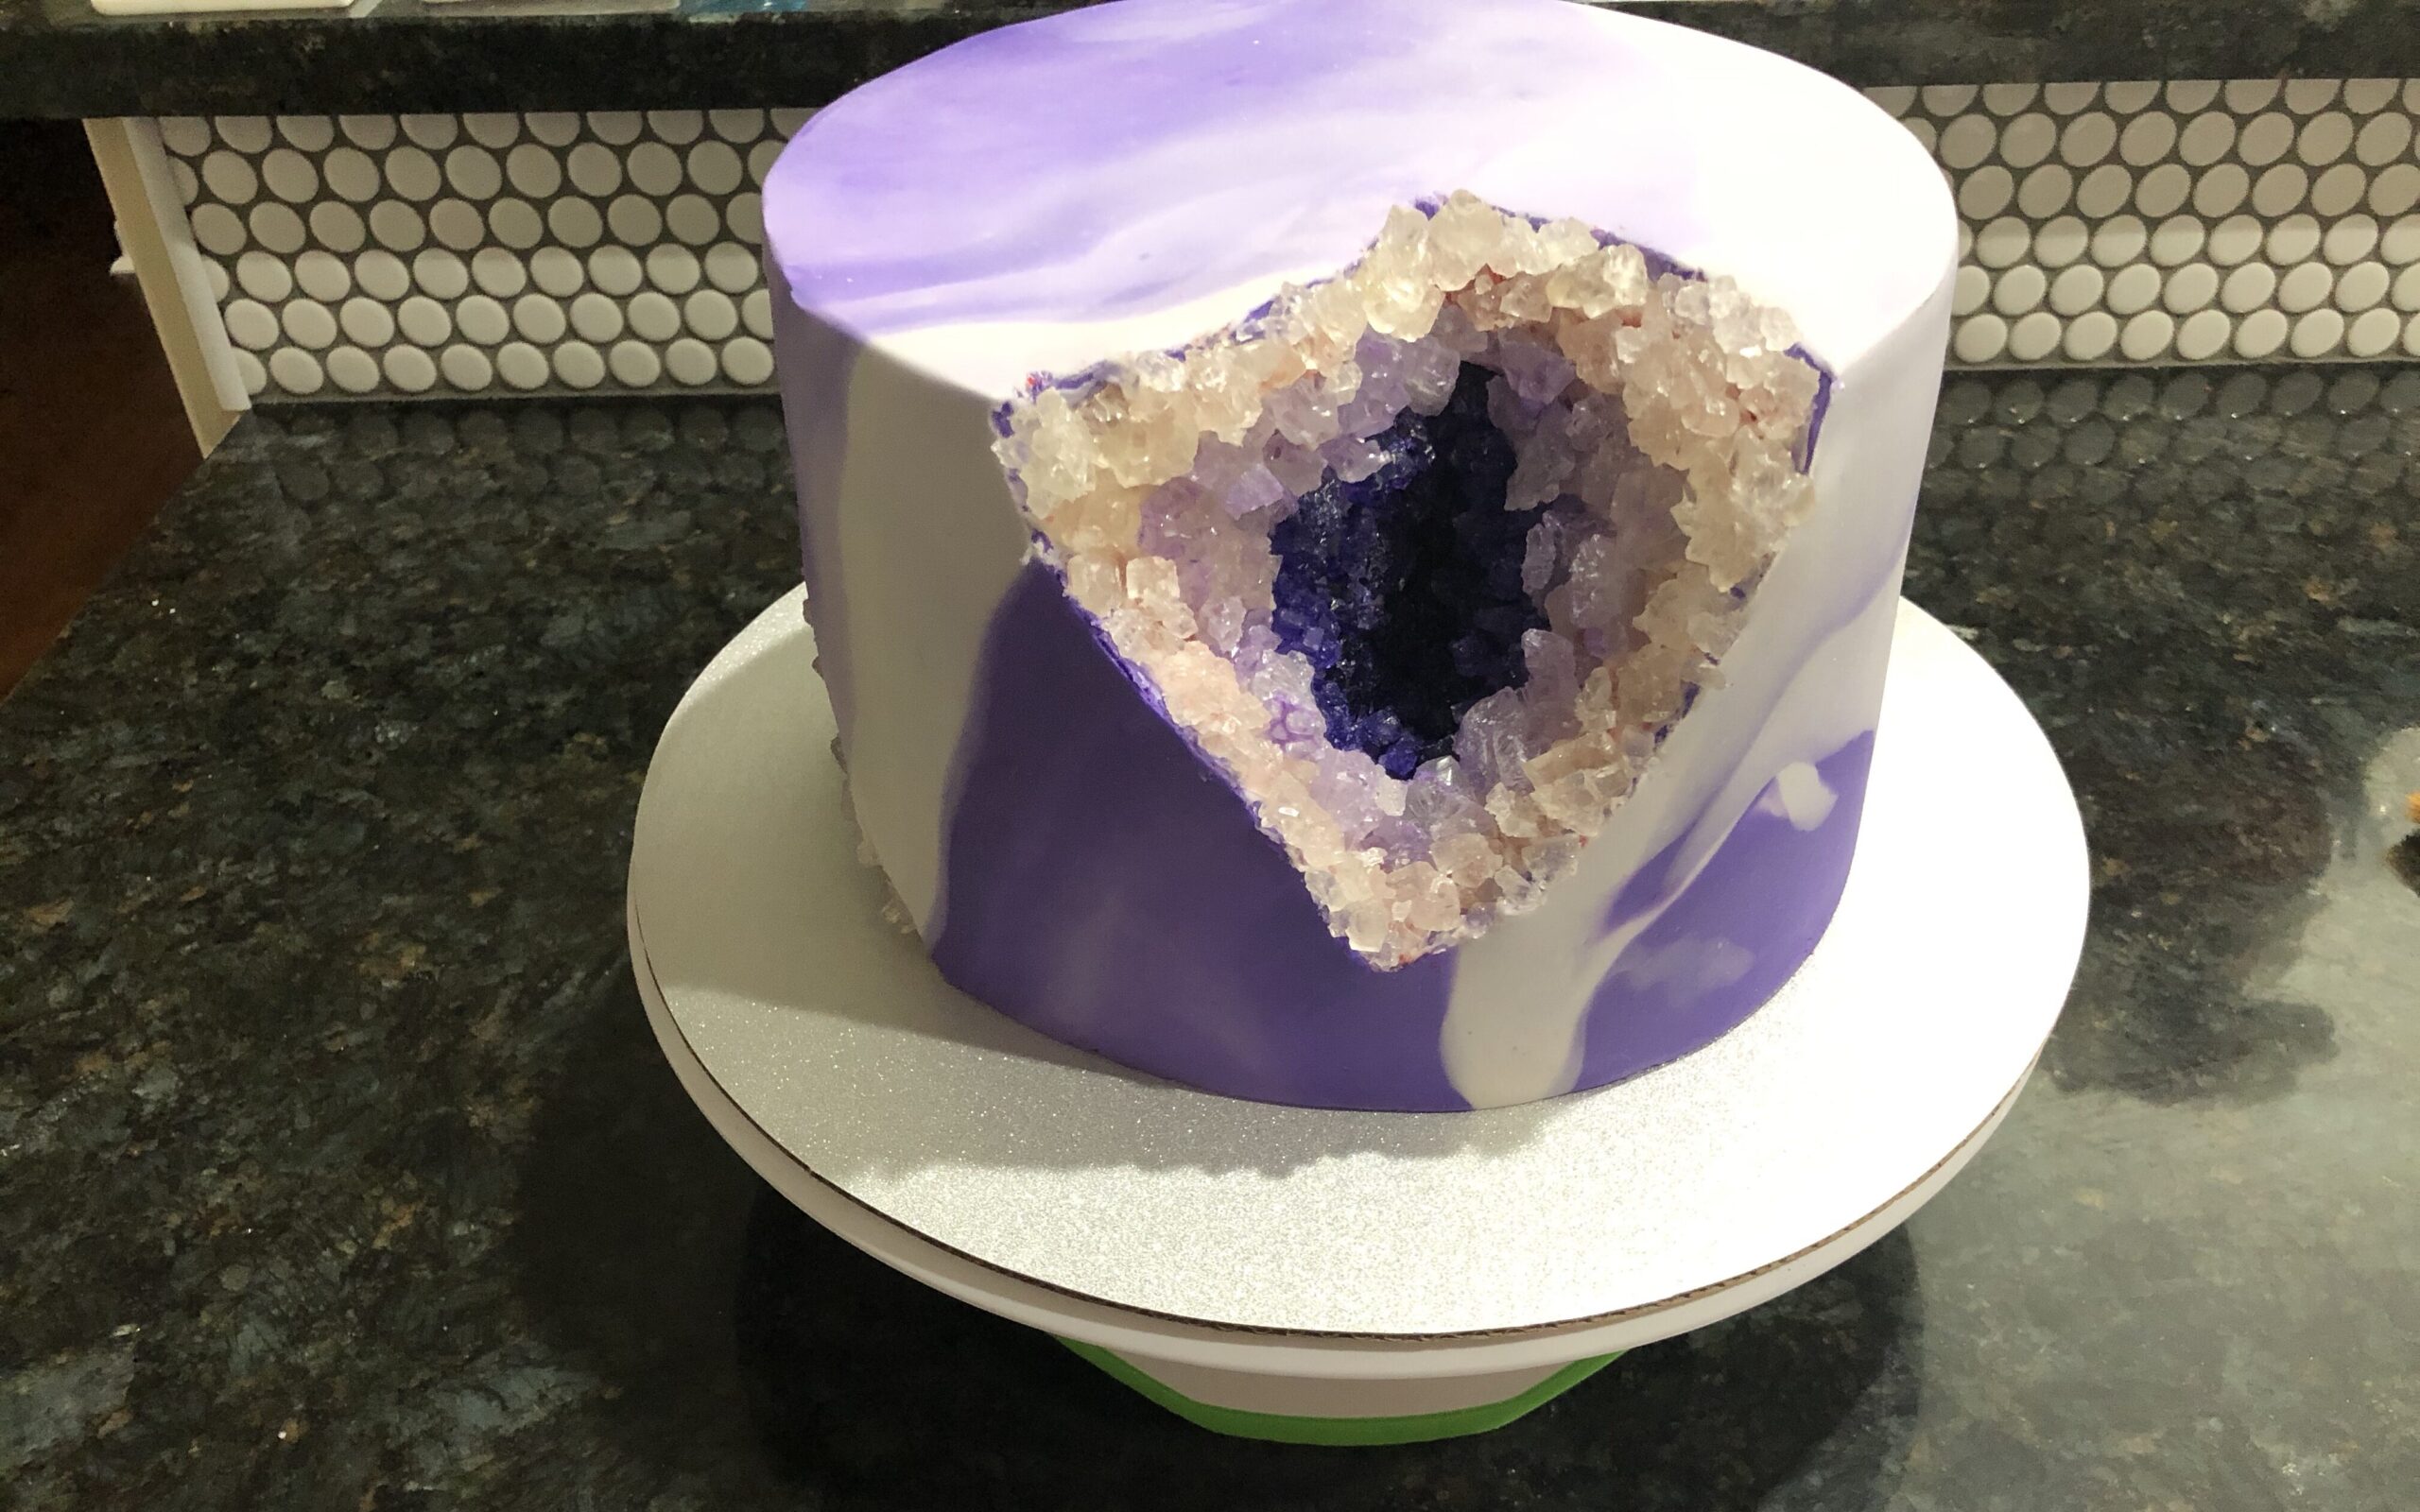
For a beautiful gradient shade of purple/amethyst, we recommend mixing different shades of rock candy. After adding the rock candy, consider adding Edible Gold Paint to the outer edge of the Geode and along the lines on the fondant for a stunning finishing touch.

While adding gold paint is optional, it can really enhance the overall look of your cake.
Congratulations! You have successfully made a stunning Geode Cake using our easy guide!
With this guide, creating a geode cake will be a piece of cake! Don’t be intimidated by the process, and feel free to use your creativity to make something unique.
Geodes come in various colors, so let your imagination run wild. And if you have a better technique in mind for making a geode cake, don’t hesitate to share it with us. Above all, have fun with it! Thanks for reading!