
When I started out making cakes, I was really intimidated by Fondant. the first time that I used fondant, I was extremely nervous and made many mistakes. It was so bad that the fondant completely stuck to the counter space.
I felt so defeated because I wanted to surprise my mom with a beautiful cake for her birthday. After a couple of tries, I finally figured out the correct way to handle fondant and properly apply it to the exterior of a cake.
I’m actually thankful for the many mistakes along the way because there was so much that I learned about fondant such as keeping the surface dusted to keep it from sticking to the countertop or sticking to the rolling pin itself.
Or keeping the surface dry and away from water because water is actually one of fondant’s worst enemy. At the same time water can be a great addition to fondant because it’s good for sticking decorations to it. Last, I also learned to keep the fondant covered while working with it to prevent it from drying out or crackling on the cake.
Please know that using fondant will require quite a bit of patience. This stuff will try to make you go crazy because its so finicky. We all strive to make those gorgeous cakes with sharp edges, neat and dry surfaces but let’s face it, its going to take loads of time and practice to get there and you will get there!
First things First!
The tools needed to cover a cake in fondant are:
- Crumb coated cake
- Fondant
- Rolling mat
- Rolling Pin
- Pizza cutter
- Sharp Knife
- Powdered Sugar
- Shortening
- Fondant Smoothers
- Turn Table
Once you have all of your tools out and ready to roll, you can start by making sure your surface is clean and dry. Begin dusting your surface with powdered sugar to avoid it from sticking to the countertop. Once the surface is well dusted, rub a little shortening over your hands and begin kneading your fondant. The shortening will prevent the fondant from sticking to your hands.
Step 1: Kneading the Fondant
Kneading the fondant before covering a cake is very important because it will help to warm up the fondant so that it will regain its elasticity and moisture. It’s best to stretch the fondant while kneading so that it will be easy to stretch when it comes to covering a cake.
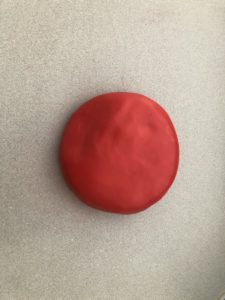
Once you’ve kneaded the fondant, you can now start to roll out the fondant. Before rolling out your fondant, its best to have it kneaded into the shape of your cake. For example, if you will be covering a round cake then your ball should be in the shape of a circle and if you will be covering a square shaped cake, then it should be in the shape of a square.
Step 2: Rolling out the Fondant
Now that the fondant in the shape of the cake, make sure to dust the surface with a good amount of powdered sugar. You can also use a rolling mat to prevent it from sticking to the surface.
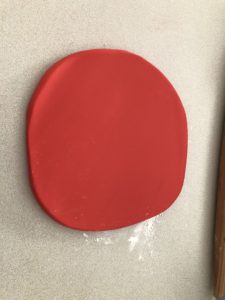
As you’re rolling out the fondant (without a rolling mat), remember to lift the fondant, dust the surface, and rotate it after to 3 rolls because it will stick to the surface and it will cause you to get pretty frustrated!
As you are rolling out your fondant, you will come across fondants other worst enemy, which is Air bubbles! I absolutely HATE air bubbles! They’re really difficult to get rid of and if you don’t smooth out the fondant good enough after you’ve poked a hole in the fondant to remove the air then you will have to knead your fondant over again, basically starting all over again.
As you’re rolling out the fondant, its best measure the height and diameter of the cake so that you will know how large you need to roll the fondant out. Also keep in mind to not roll out the fondant to thin because it will lead to your cakes looking really sloppy and frail. On the flip side of that, its best to not roll out the fondant out too thick. I usually roll my fondant to 1/4 of an inch of thickness.
Step 3: Covering the cake in fondant
Once you’ve rolled out your fondant, place a crumb coated cake on to the turntable. Start dusting the rolling pin with powdered sugar and then sit it on the edge of the fondant and roll the fondant over the rolling pin towards yourself so that it will roll over the rolling pin.
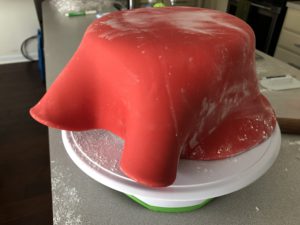
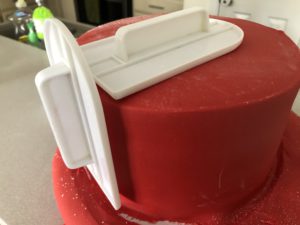
Next you will take the fondant and then un-roll it out over the cake. Then begin smoothing out the top of the cake with the cake smoothers or what my Fiance calls the “Cake Irons”. As you’re smoothing out the top of the cake, it’s best to rotate the cake while smoothing the top and lifting up the fondant (before it has stuck to the sides of the cake) on the sides to release some of the air that may get trapped underneath the fondant.
If you do not release the air from underneath the fondant, air bubbles ,ay form and can cause the cake to budge which is pretty annoying. After the top of the cake has been smoothed out, releasing the air from underneath the fondant, begin sticking the sides down and complete the same process by smoothing out the sides. While rotating the cake on the turn table, you can gently pull and stretch the fondant over the sides.
Be careful not to allow the fondant fold at the bottom because that will cause your fondant to have creases in it and it’s really difficult to make them less visible.
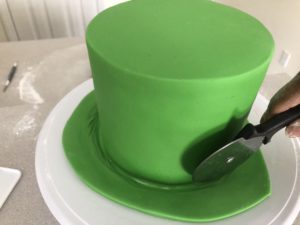
After covering the sides of the cake, I usually take the cake smoothers and slide them back and forth around the bottom edge of the cake to make a crater that will show a line for where to cut off the excess fondant. This trick helps to create a neat and clean bottom edge without cutting too much fondant off of the cake.
This trick will come in handy for those cakes that do not have boarders on the bottom. So its best to make sure that you have clean and neat edges on the bottom as well.
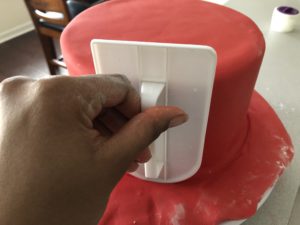
Now that you have covered the sides of the cake with fondant, you can now create those sharp edges with the cake smoothers. Depending on the look of your cake, you can either choose to leave the edges rounded on continue to smooth them out to create those sharp edges that everyone is going for. One technique that I use to create sharp edges is by pinching the edges gently with both of my index fingers.
After lightly pinching the edges all around the cake, use the cake smoothers to smooth out those edges so that they’re sharp. While smoothing out the edges, move the cake smoothers in a circular motion so that it will not cause the fondant to lift up from the bottom of the cake, off of the cake board.
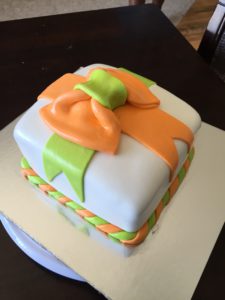
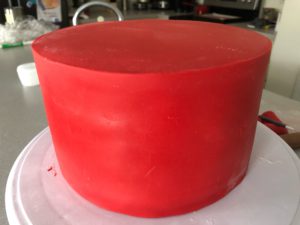
You Just covered a Cake in Fondant:
Covering a Cake in Fondant will feel like a big accomplishment considering how difficult it can be to handle. Depending on your recipe, your fondant should be firm and yet elastic in order to stretch over the cake. I have a really good Marshmallow Fondant recipe that’s easy to make and tastes really delicious as well.

Now you can go on to making some really awesome cakes for all types of events in various types of designs. Each time that you make a cake, you will grow to learn all of the endless possibilities that you can do with fondant.