
Personally, I love birthdays! I love celebrating life and making someone feel special on their birthday. One way that I and many other bakers in the world make individuals and loved ones birthday feel special is by making them a birthday cake.
Birthday cakes are fun and super cool to make. They’re not as stressful to make like a wedding cake. My nerves are always on level 10 when I have to make a wedding cake because you don’t want to destroy someone’s wedding by putting together a horrible looking cake.
But with birthday cakes, you have to ability to add your own touch to them. You can choose to make them over the top with a simple smash cake on the side, for the baby to do whatever he or she desires to do with it.
For my first child, I gave her the top tier from her three tiered cake to smash. But with my second child, I decided to make an actual smash cake. Smash cakes are very simple and easy to make. Plus, they go well with any photo shoot or birthday party.
So by now, I guess you’re probably wondering, okay…..so how do I make a smash cake? We will dive right into that now.
To get started, here’s the materials you’ll need:
- Three layers of Cake, 4 or 6 inch in diameter
- Buttercream (or any frosting you prefer)
- Fondant (optional)
- Frosting Spatula
- Cake Board
- Cake Turntable
- Cake Scraper
Step 1: Leveling the cake
In this step, you’ll start by leveling the cake layers. This process will consist of cutting off the dome of the cake layer. As I mentioned in my article on (article link), it’s very important to level each cake layer to avoid any structural issue with your cake and the design.
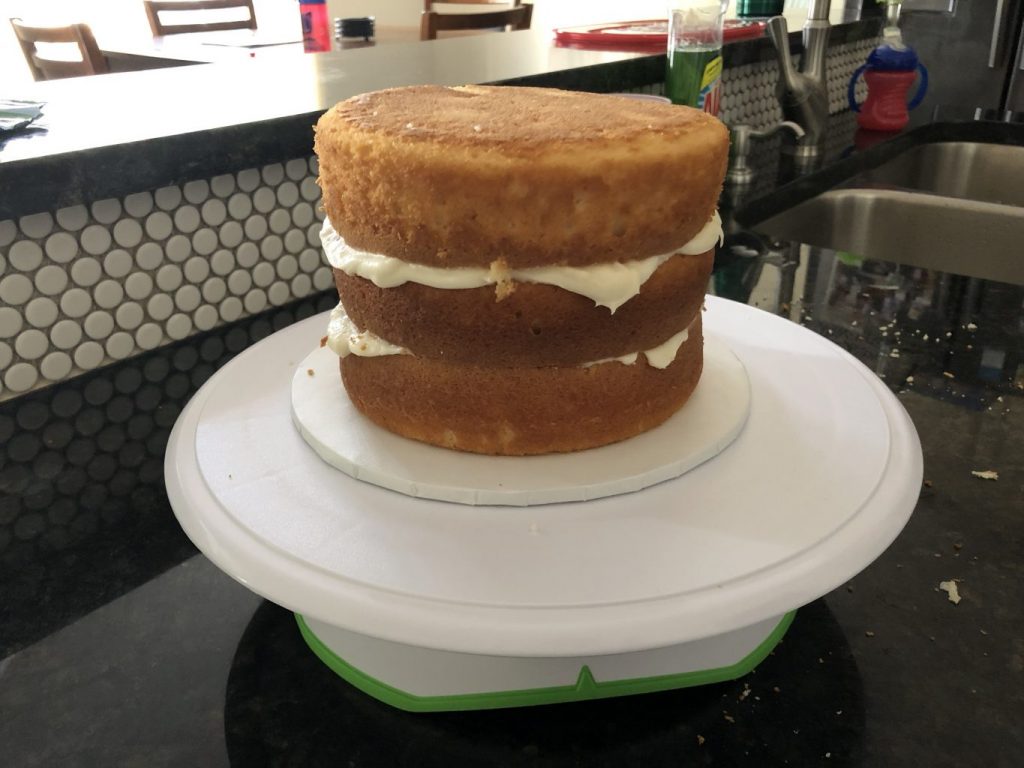
Leveling a cake helps with strengthening the structure of the cake for the decorations that will be added to the exterior. No one really cares for this part in the process of cake decorating, but this important part will ultimately determine whether you’ll have an amazing and sturdy cake or not.
Step 2: Crumb Coating the Cake
Crumb coating the cake is a very simple and easy process as well. In this step, you have to be a little patient with letting the buttercream crust over before adding the top layer of icing. It’s very difficult to add icing to the exterior of the cake without let it firm up first.
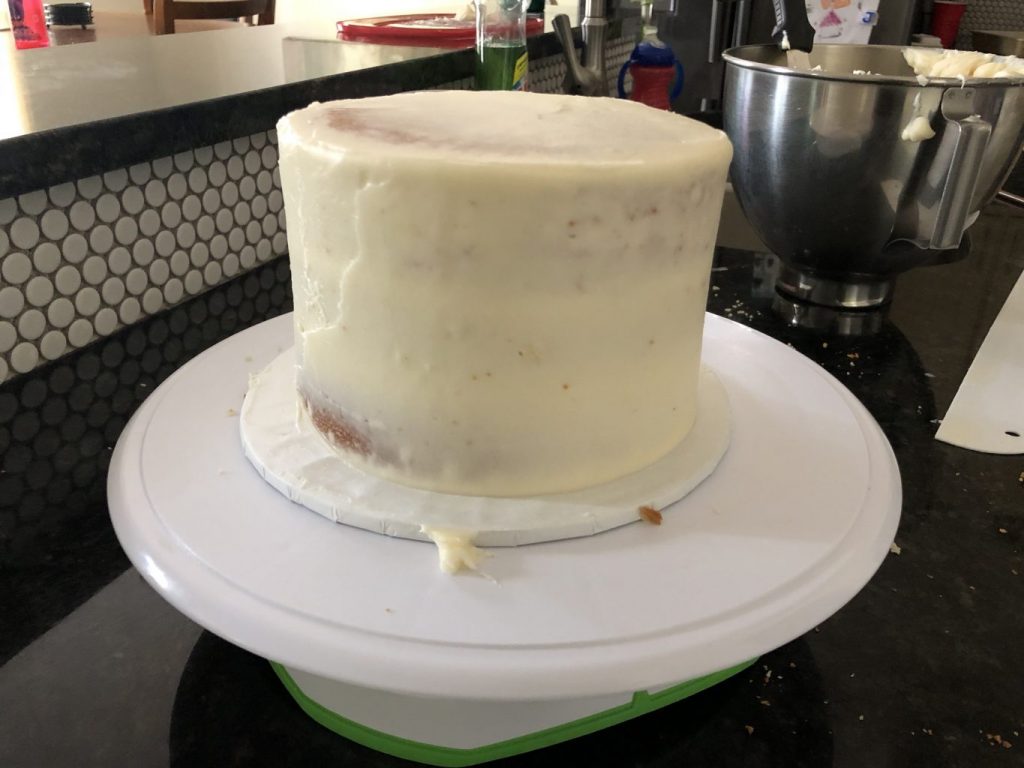
In the past, I have tried to decorate a cake without placing it into the refrigerator to crust over and the whole time the cake just kept sliding from left to right. The icing was too warm and soft and was not able to hold each cake layer in place. It was truly horrible. Therefore, crumb coating your cake is a must, it will definitely keep you from loosing your mind.
Please also check out my other article on (article name). It will definitely show you really easy ways to crumb coat a cake and create sharp edges on your cakes with buttercream.
Step 3: Decorating the cake
In this step, you will now add the last layer of icing to the exterior of the cake. This can be done using a cake spatula and adding small amounts at a time to the cake. This can also be done by filling up a piping bag with frosting and piping line all the way around the cake and the top as well. After the outer layer has been added to the cake, begin smoothing out the icing so that there aren’t any air pockets or unfilled areas on the cake.
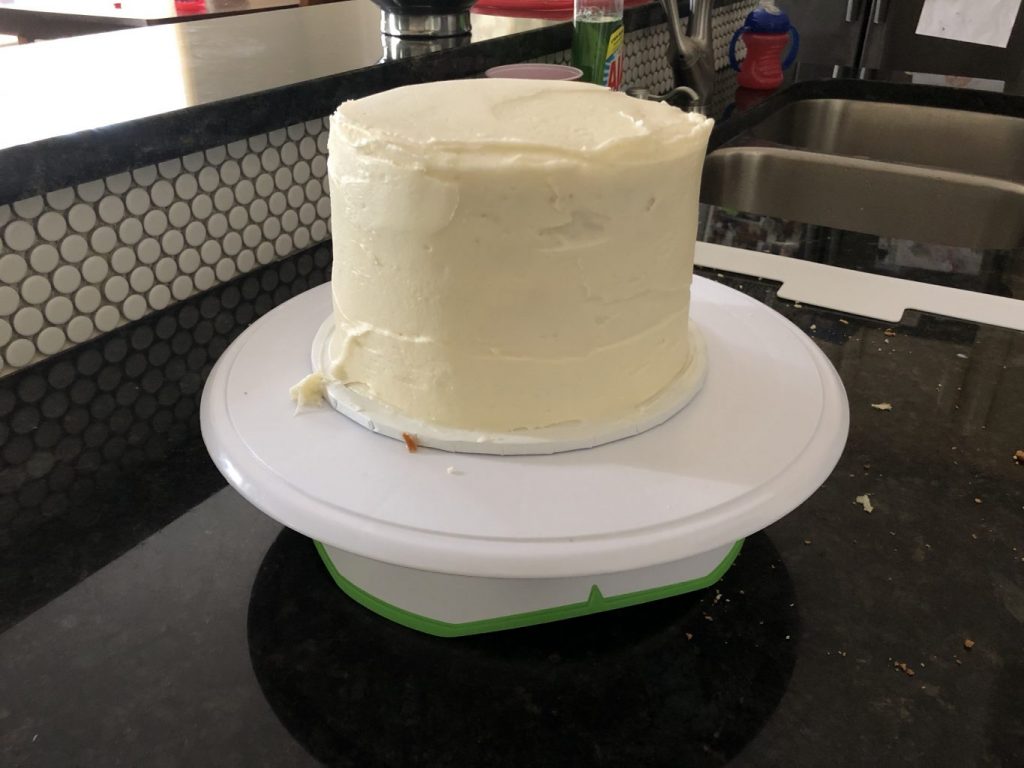
Now, you can begin adding the decorations to the exterior of the cake. It can be fondant, sprinkles, or anything that will go with the design or theme for the party. It’s really your choice so do your best to have fun with it.
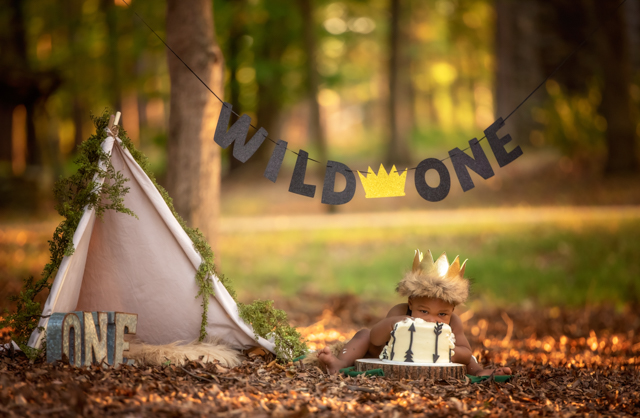
For this smash cake, we decided to go with the Wild One theme for his birthday party and photo session. I got some really cute and simple ideas for it. I decided to print out some aztec arrows to use as a template to cut them out. Simply, cut out the arrows. After cutting out the printed arrows, roll out the fondant. It’s best to make the fondant thin so that its not too thick and bulky on the cake.
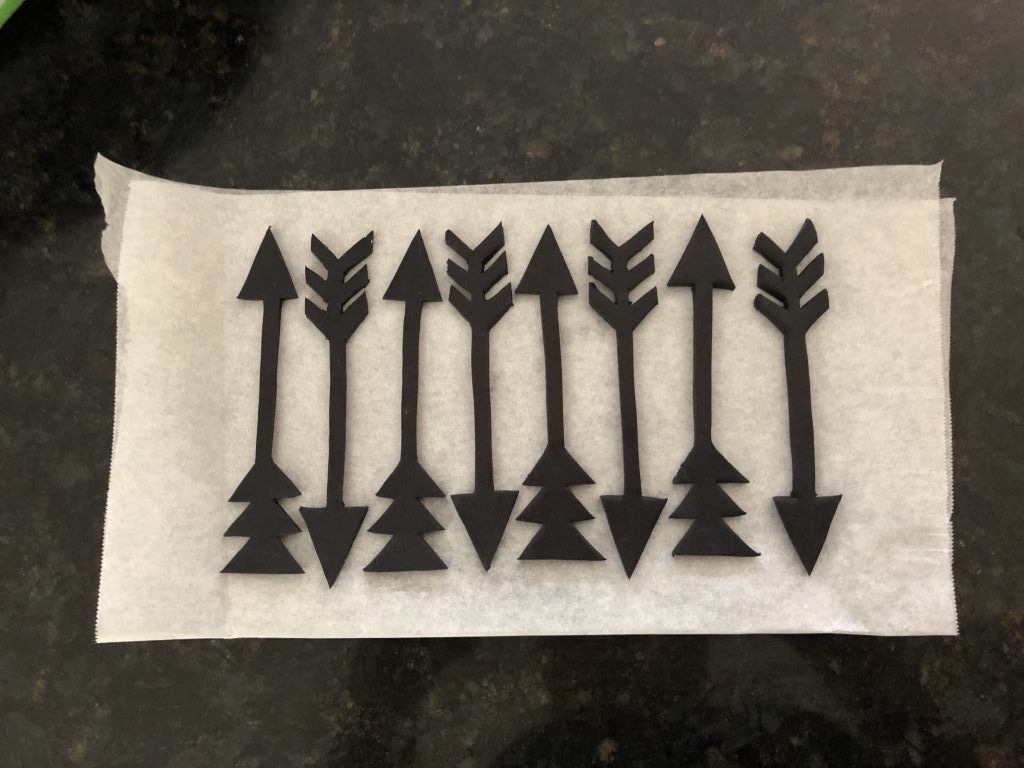
Once the fondant has been rolled out, place a small amount of shortening on the backside of the printed arrow and place it on top of the fondant. Using an exact knife, begin cutting out the arrow. After the arrow has been cut out, lay it on to a piece of parchment paper to dry. To make more arrows, simply repeat the same process again. After all of the arrows have been cut out, allow them to dry for at least 4 hours. Once the have dried or have become stiff, place it onto the cake.
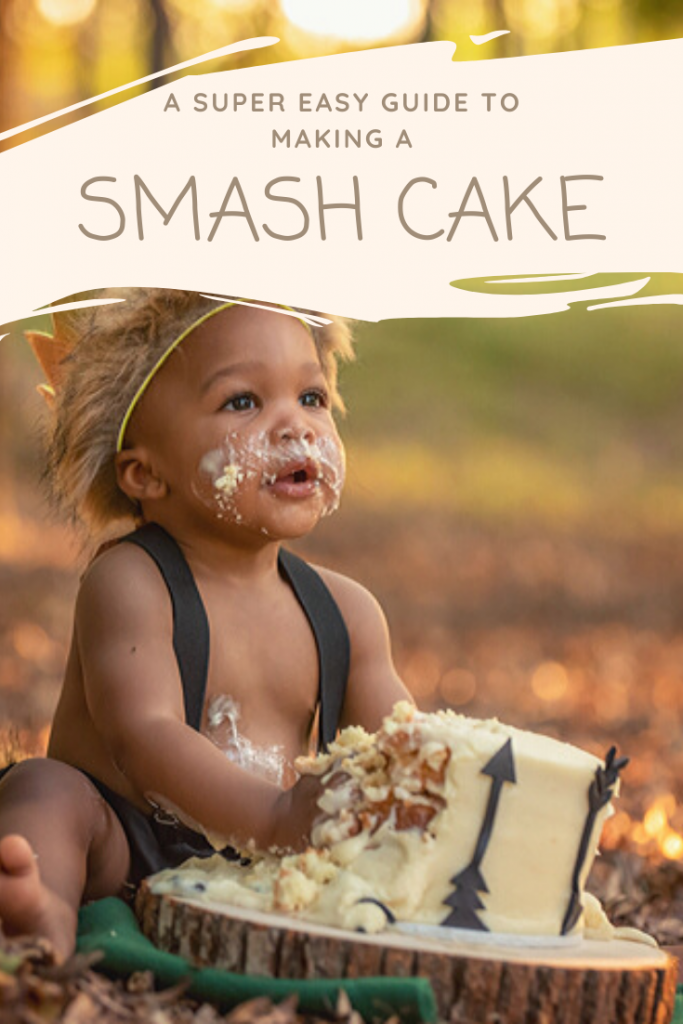
That cake is ready to smashed!
Please brace yourself for this part, because it will get pretty messy. It’s really awesome to watch your child have fun with something that you put together for them, but very difficult to watch since you worked hard putting it together.
It’s also great to look back on photos of your child’s first birthday of he or she literally destroying the cake because they will grow up so fast and all of the cuteness will fade away. But more than anything, remember to have fun with your smash cake, because your child will definitely have LOTS of fun with it.