

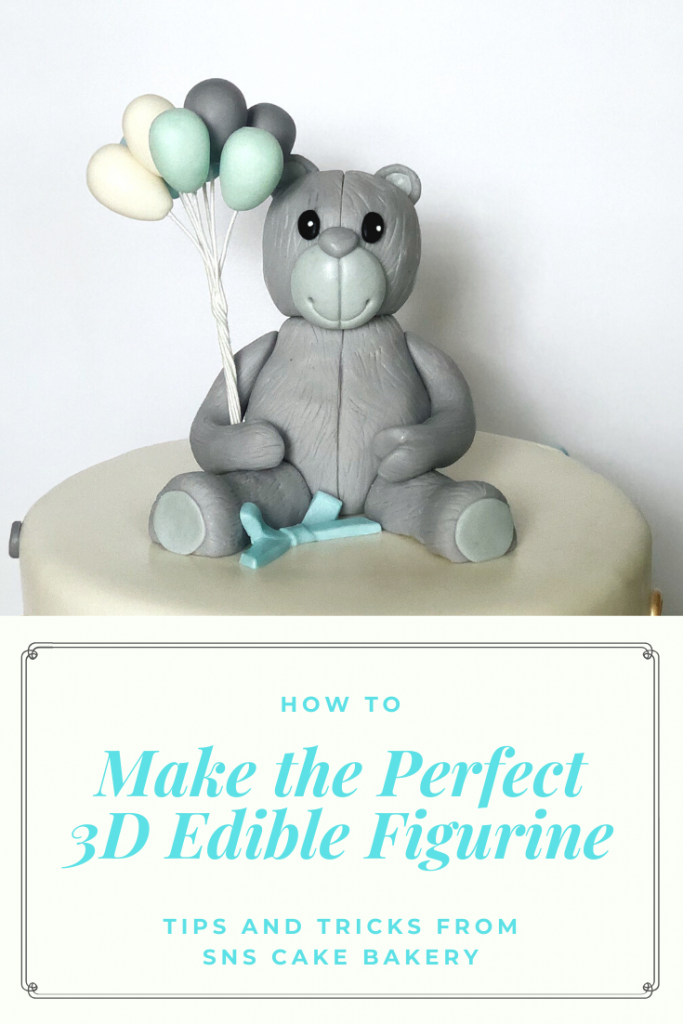
3D Figurines have always been the grand finishing touch on a cake. They help to enhance the look of any cake. 3D figurines can be made with fondant, rice Krispy, or even gum paste. To make the figurine more realistic, you can use objects such as PVC pipe, metal or wood dowels,
For this method of making a 3D Figurine, here’s the items you will need:
- Rice Krispy
- Fondant
- Etching tool
- Tooth picks
- Edible sugar eyes
- water/shortening
Step 1: Creating the base for the Figurine
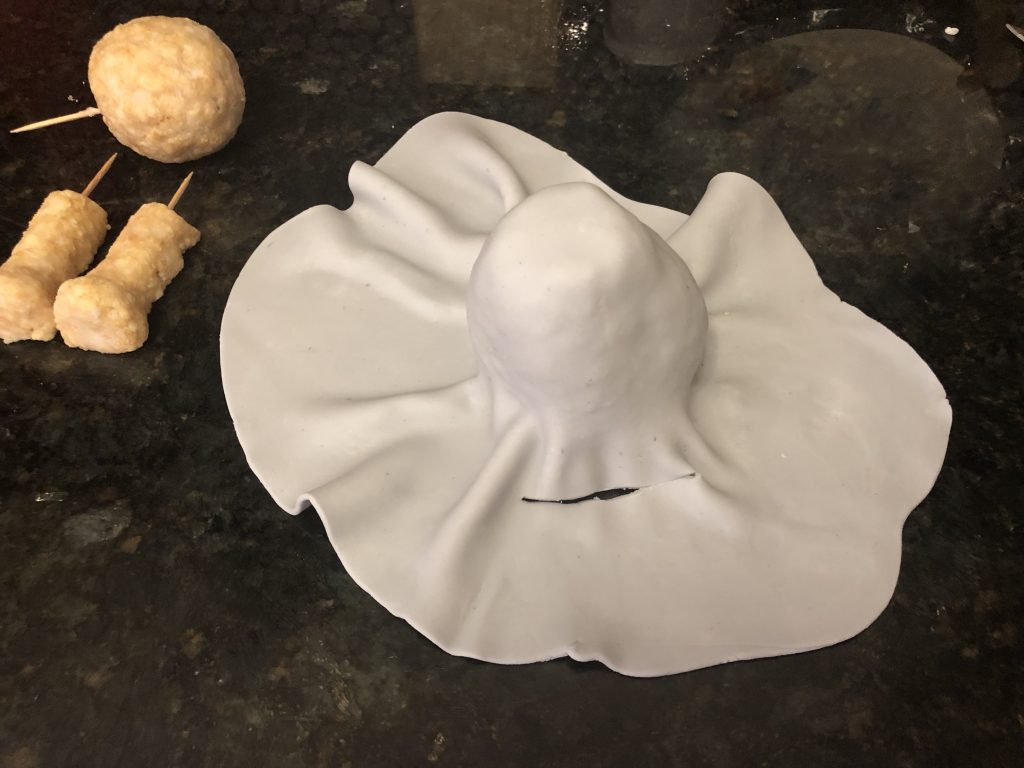
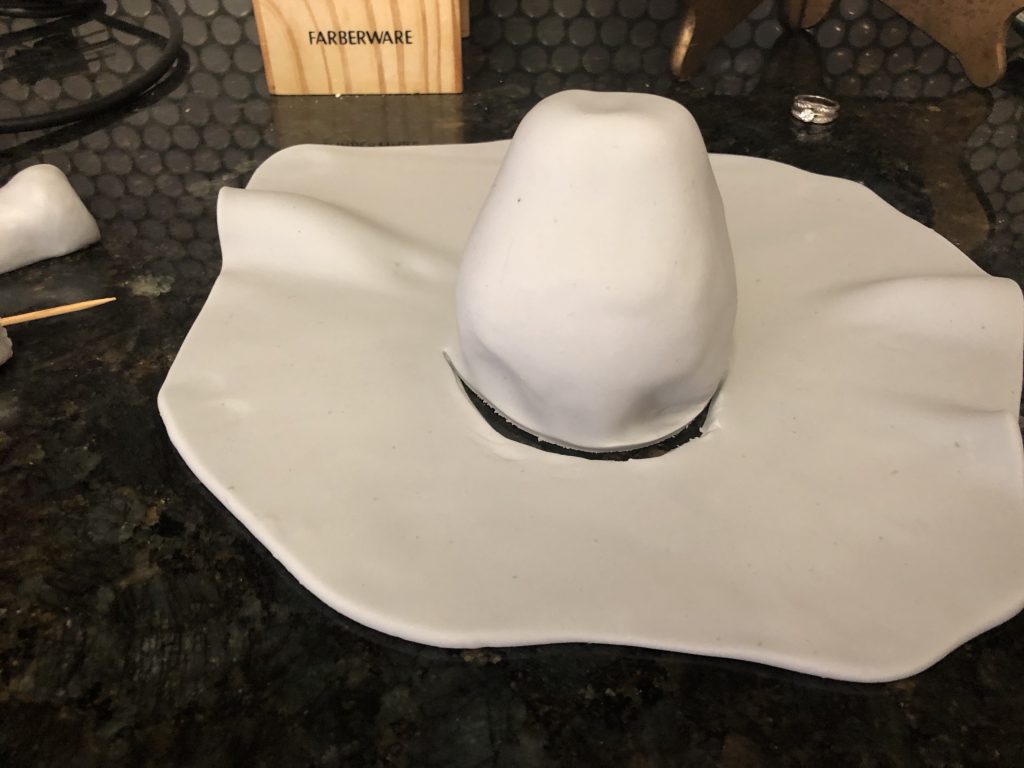
First, it’s best to create the base or shape of the figurine. But before creating the base of the figurine, you have to decide on how big or small the figurine should be. For example, if the figurine will sit or stand on top of the top tier of the cake, use a cake board that has the same diameter of the top tier to gauge the size fo the figurine.
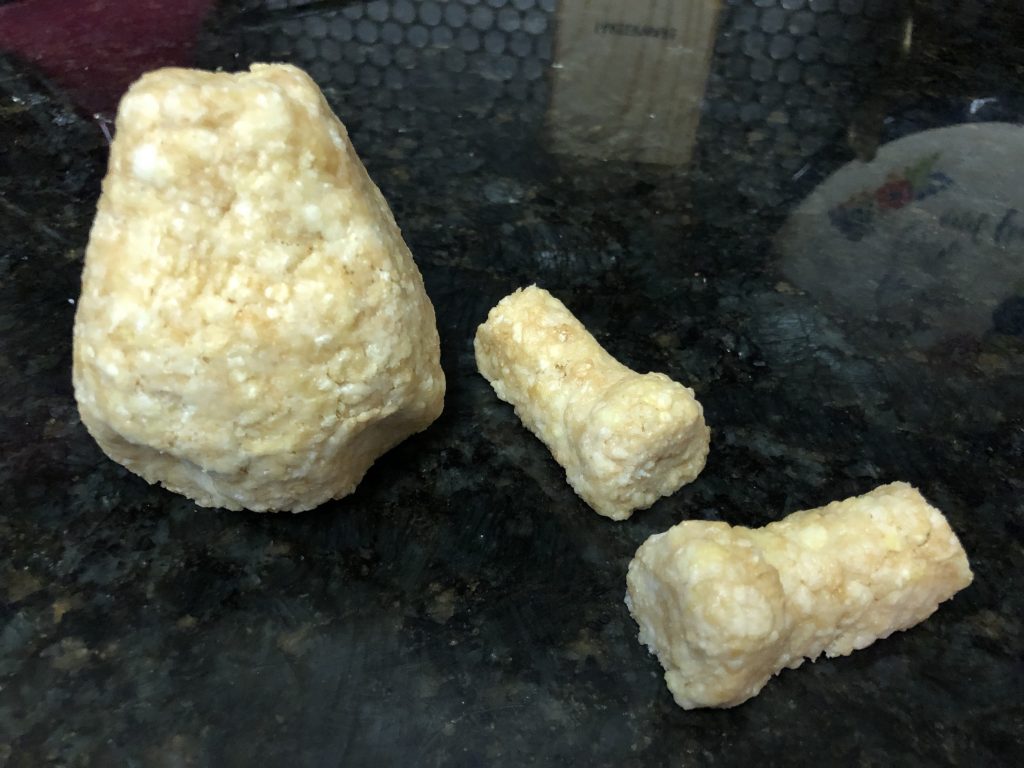
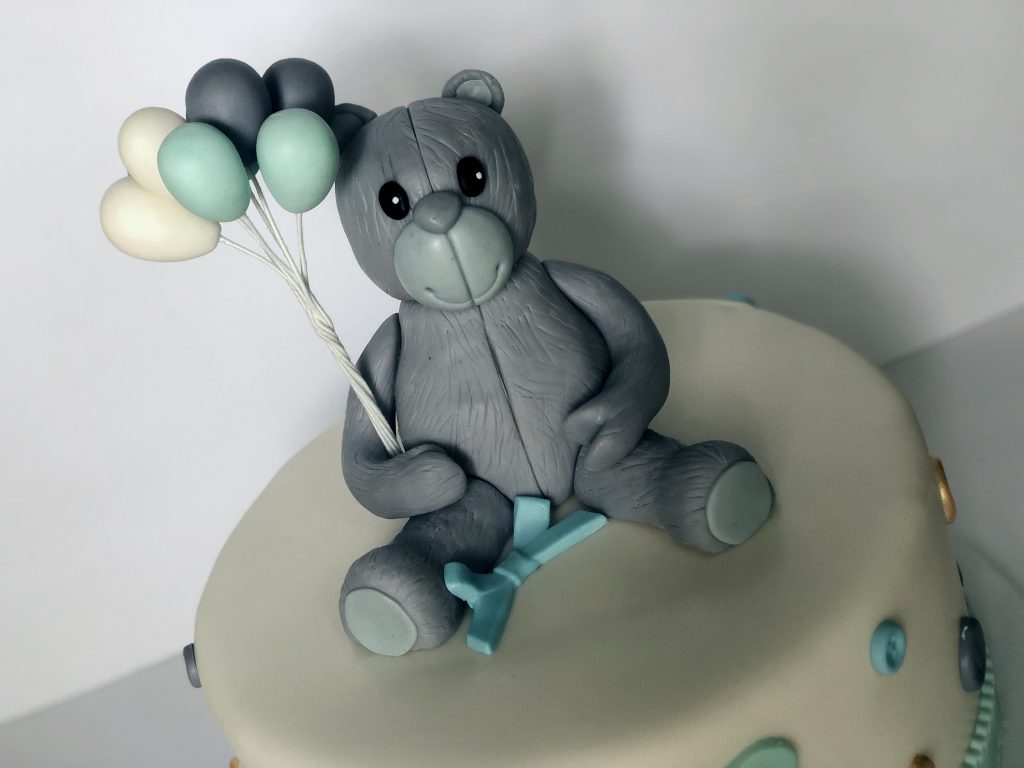
For this tutorial, I decided to create a 3D Teddy Bear figurine. I used Rice Krispy to create a sturdy base for the figurine.
Gum Paste will work but I find it more beneficial to use Rice Krispy to create a sturdy structure for the figurine.
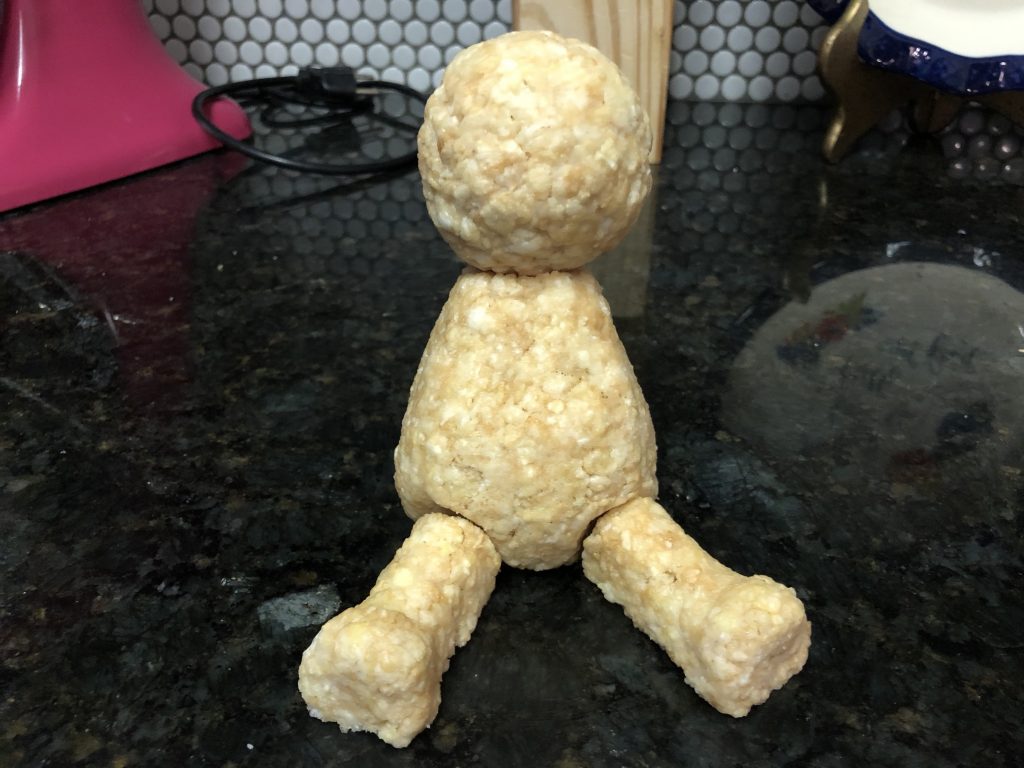
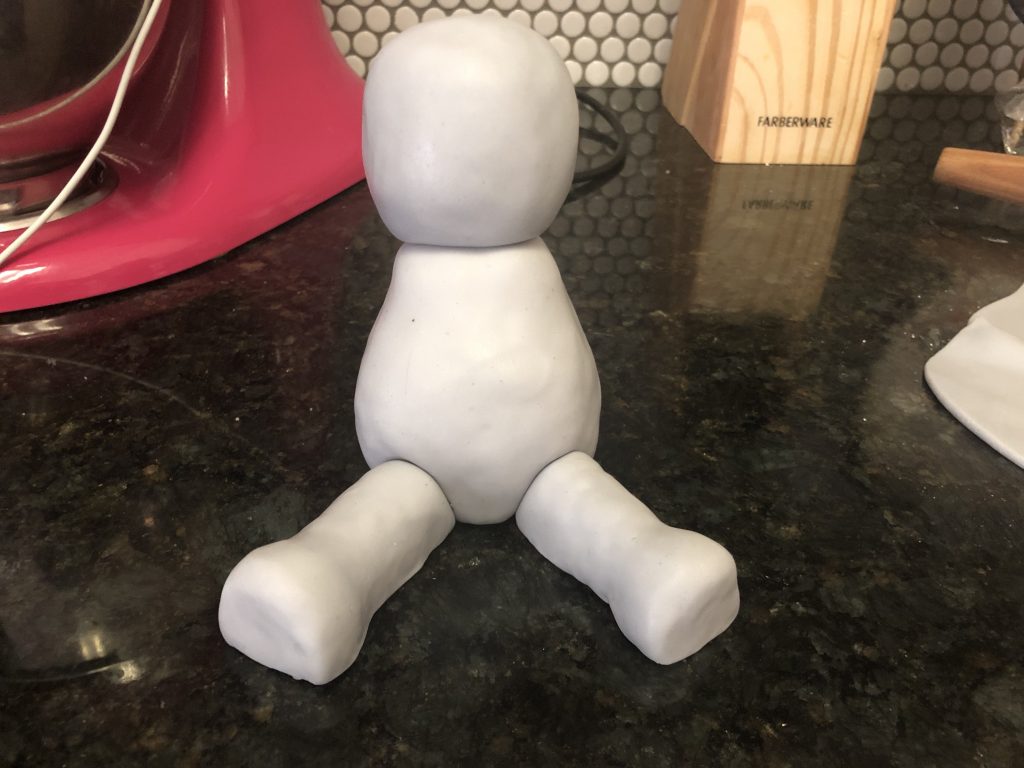
Gum paste is great for small figurines. To create the base, I broke the teddy bear up into parts, by starting with the head first, the torso second, the legs third, and last the arms.
Step 2:
In this step, you will mainly work towards filing in the lumps on each piece or body part of the figurine. First you’ll start by adding a thin layer of buttercream to the exterior of the figurine.
The buttercream will work as glue for bonding the first layer of fondant to the to the figurine. After applying the first layer of fondant, smooth out the surface of each piece of the figurine with a cake smoothing tool.
This will help to create flat surface while filling in those gaps of the rice Krispy. Now you will roll out a second piece of fondant for the exterior of the figurine.
This layer of fondant will act as he top coat for the figurine. To apply the outer layer of fondant, lightly add water or shortening to the surface of each piece of the figurine and repeat the process with covering each piece with the outer layer of fondant. Now you will see that each piece of the figurine is lump free and ready to put together.
Step 3: putting the figurine together
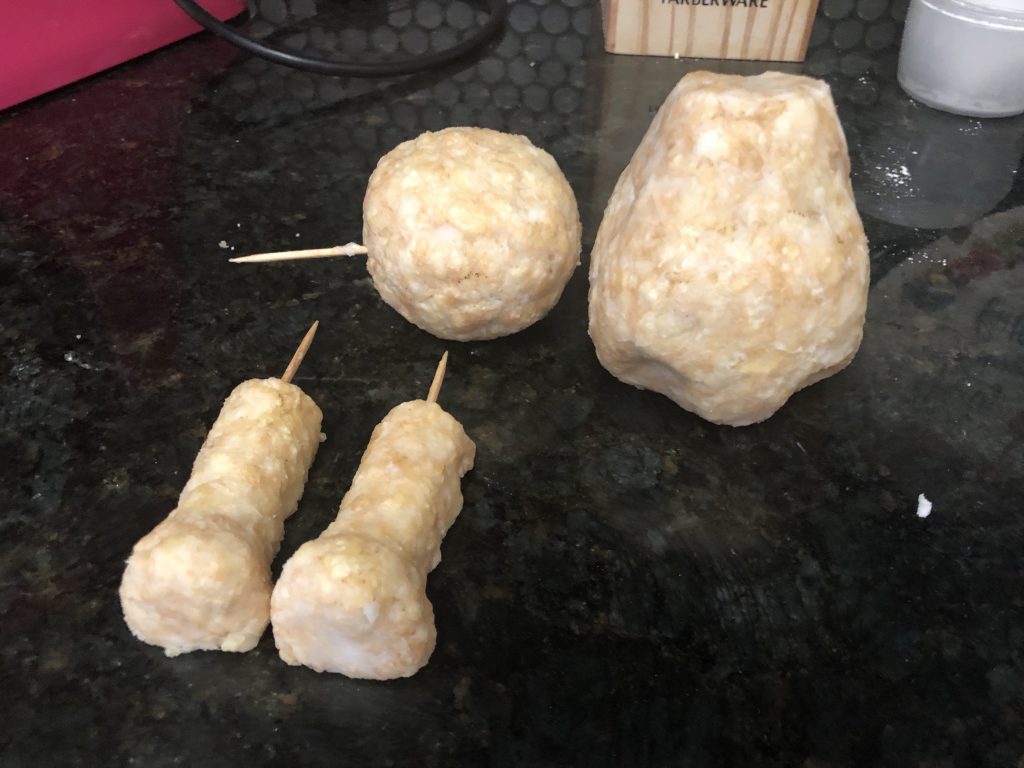
To connect each piece together, I placed a toothpick into each arm, leg, and the head. The toothpick with create stability for your figurine so that it does not fall apart.
Before placing each arm, leg, and the head on to the torso, I lightly brushed water on to each end where the toothpick was placed so that it will glue to the torso as well. Now, you’ll begin adding texture such as fur for the bear.
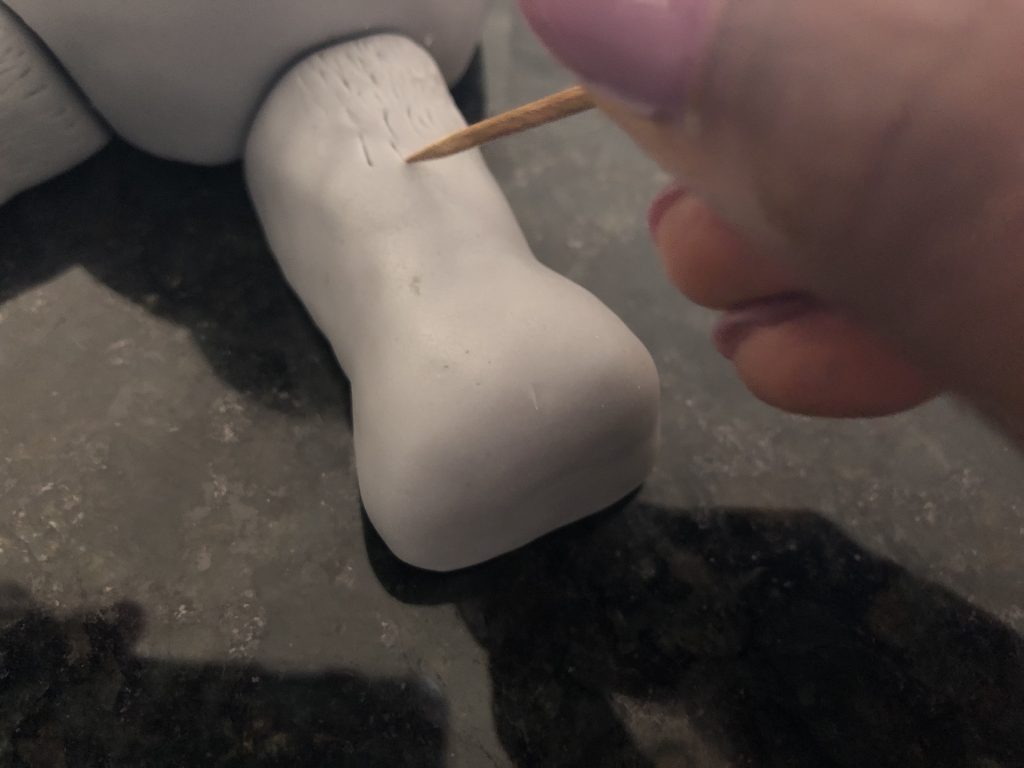
To make a fur like texture, you can use a toothpick or the etching tool which is used to remove air bubbles in royal icing but it works great for this technique as well.
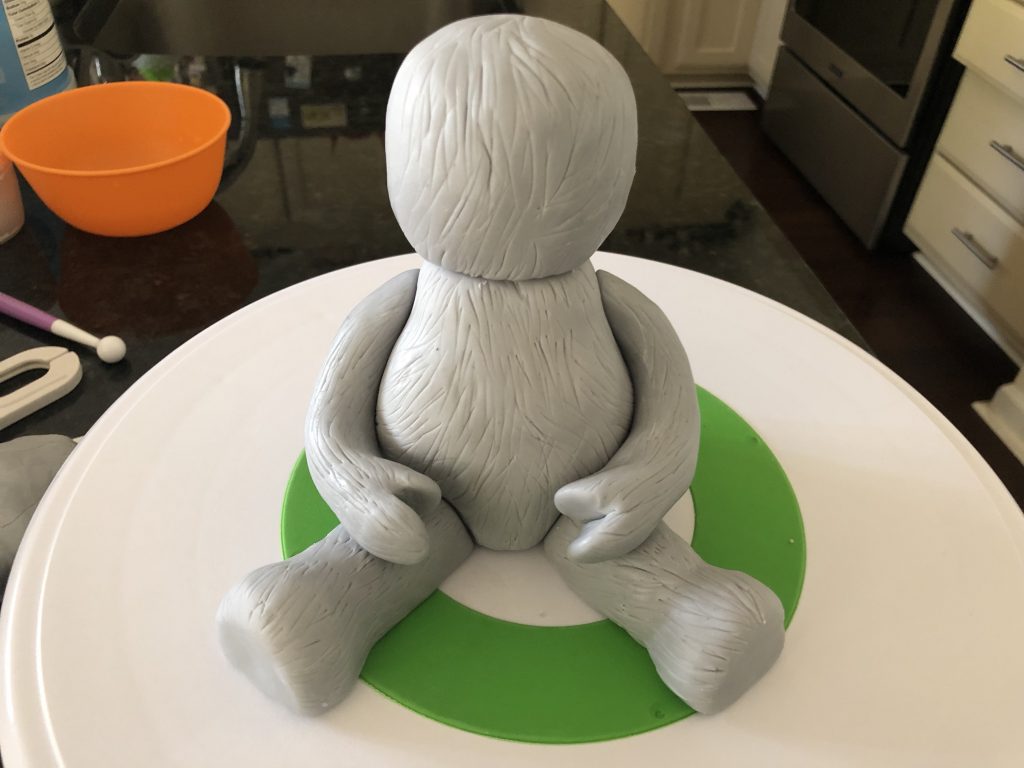
Try not to force the etching tool or toothpick into the fondant, but act as if you’re lightly brushing it.

Once you have completely covered the figurine in the fur like texture, you can now more on to adding the eyes, ears, and nose for the bear.
See, that was easy!
There you have it, an easy way to making a large figurine. I love how this method is easy to work with because unlike gum paste, once it’s dry you cannot undo it and fix it. With this method, if you happen to mess-up along the way, you can peel the fondant off and reuse it (just make sure there’s no rice Krispy on the back of it) and re-mold the rice Krispy into the correct shape for your figurine.
I hope you all will find this helpful because it has worked for me over the years. If you all would like to share what has worked for you when it comes to making 3D Edible figurines, please feel free to share in the comments. Thanks and God Bless!