
Christmas has always been one of my favorite holidays. I love the idea of spending time with family and sharing gifts because at the end of the day spending time with family is what’s most important. An amazing way to share time with your family is creating a delicious but yet simple Christmas dessert that everyone will enjoy.
Tools needed:
- Wilton 3D Sports Ball Pans
- Frosting
- Fondant
- Carving knife (cutting the domes off of the cake)
- Cake Board
- Turntable
- Sprinkles
- Edible Metallic Paint
- Edible Glitter
- Sugar sprinkles
- flexible cake scrapper
Step 1: Baking the Cake
The fondant is much more better to work with a day after making it. For this cake, I decided to make cream cheese frosting because what else goes well with red velvet cake guys?! Please also check out my awesome tutorial for making some delicious Cream Cheese Frosting. It’s a very simple and easy recipe that I’m sure you’re going to love it. So after preparing the cake, cream cheese frosting, and fondant. You can now move on to the fun part, which is decorating the cake.
Step 2: Putting the Cake together
When it comes to putting this cake together, flip one half of the ball on to the round side and begin filling the top flat surface with cream cheese frosting.
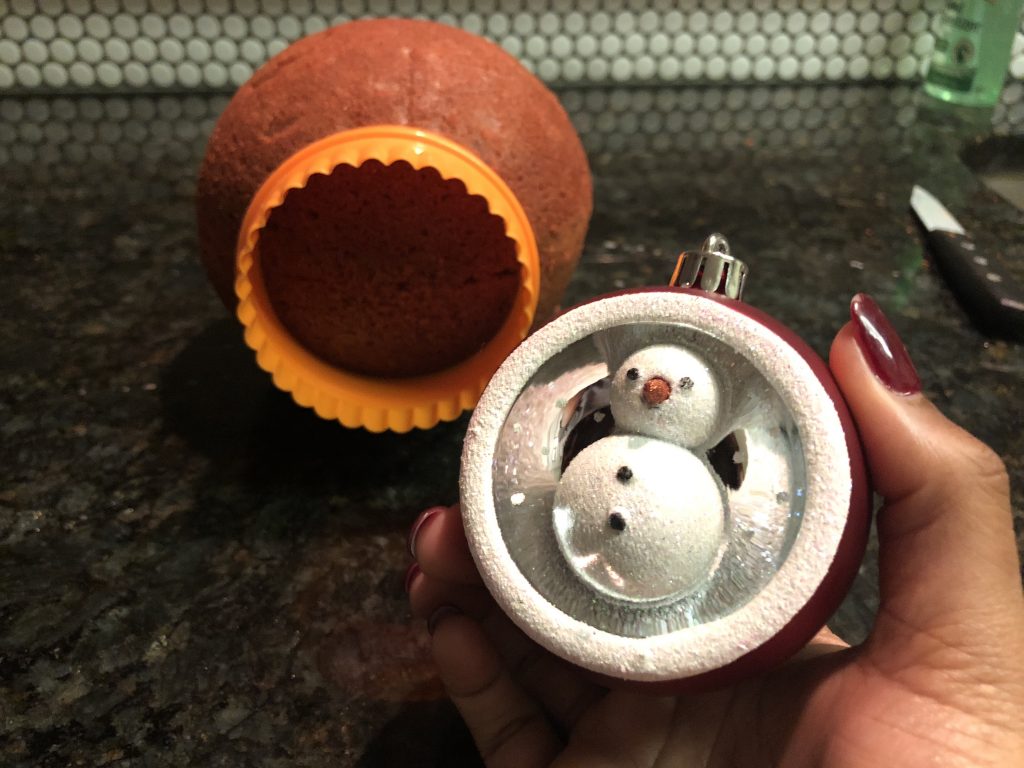
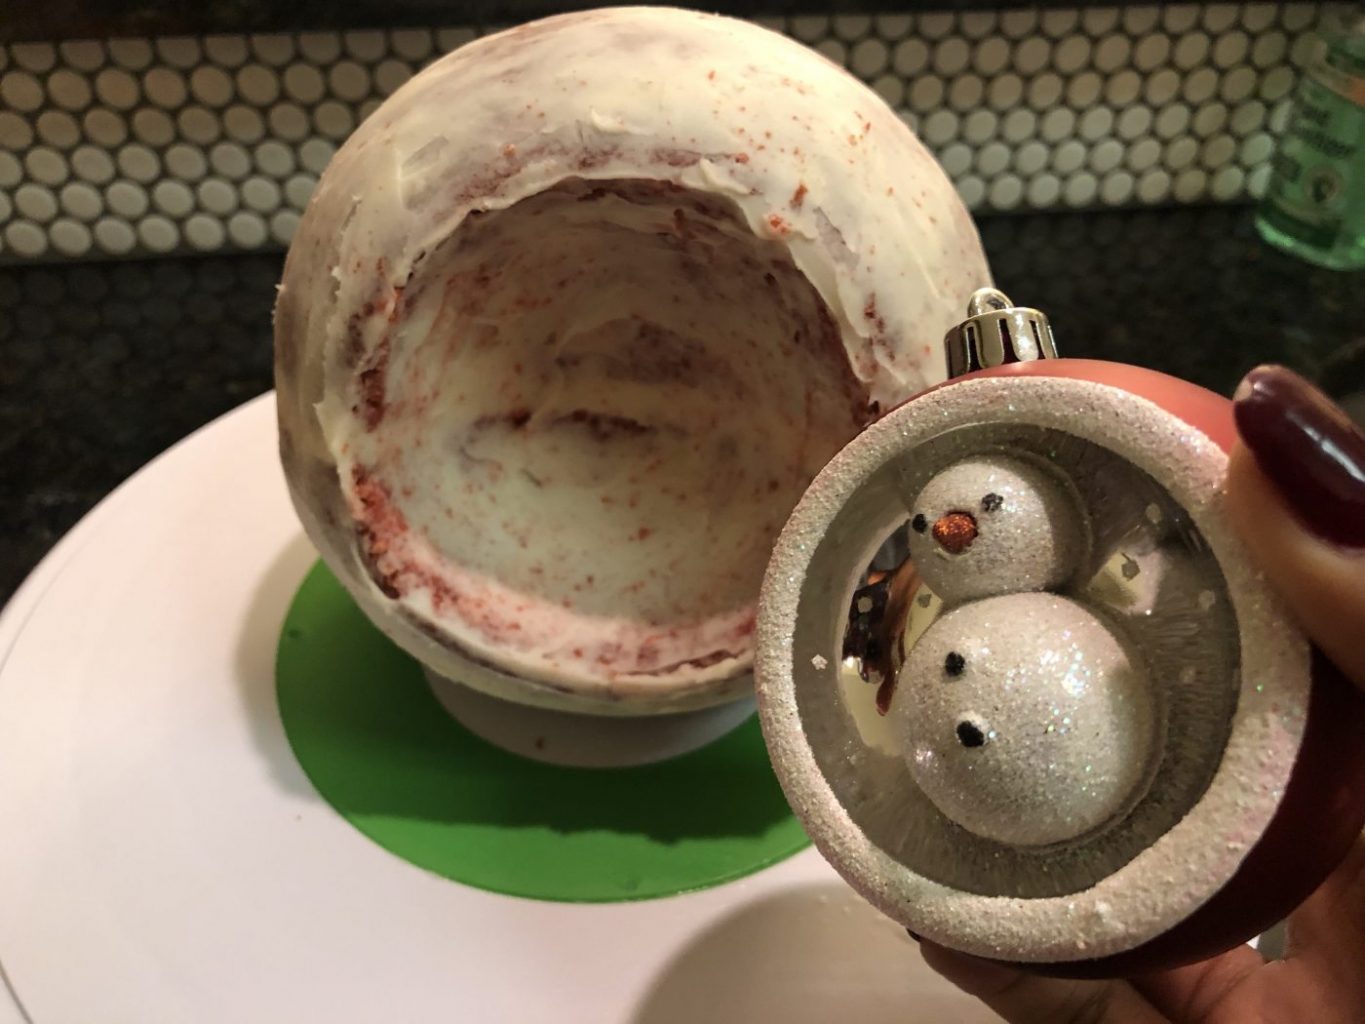
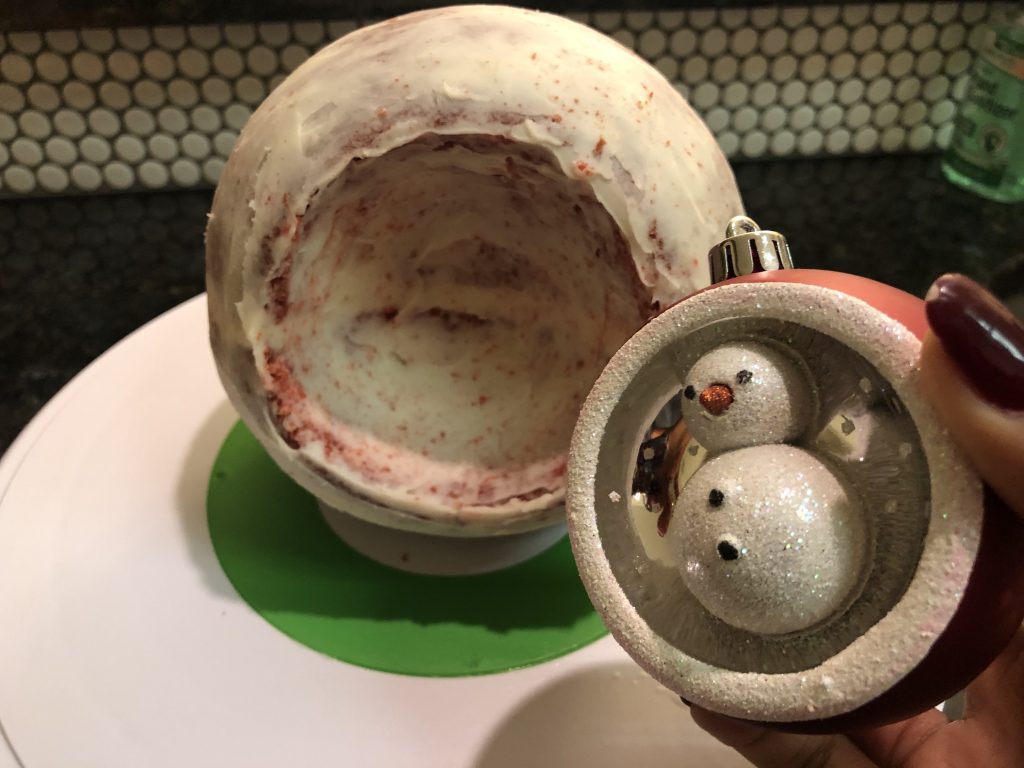
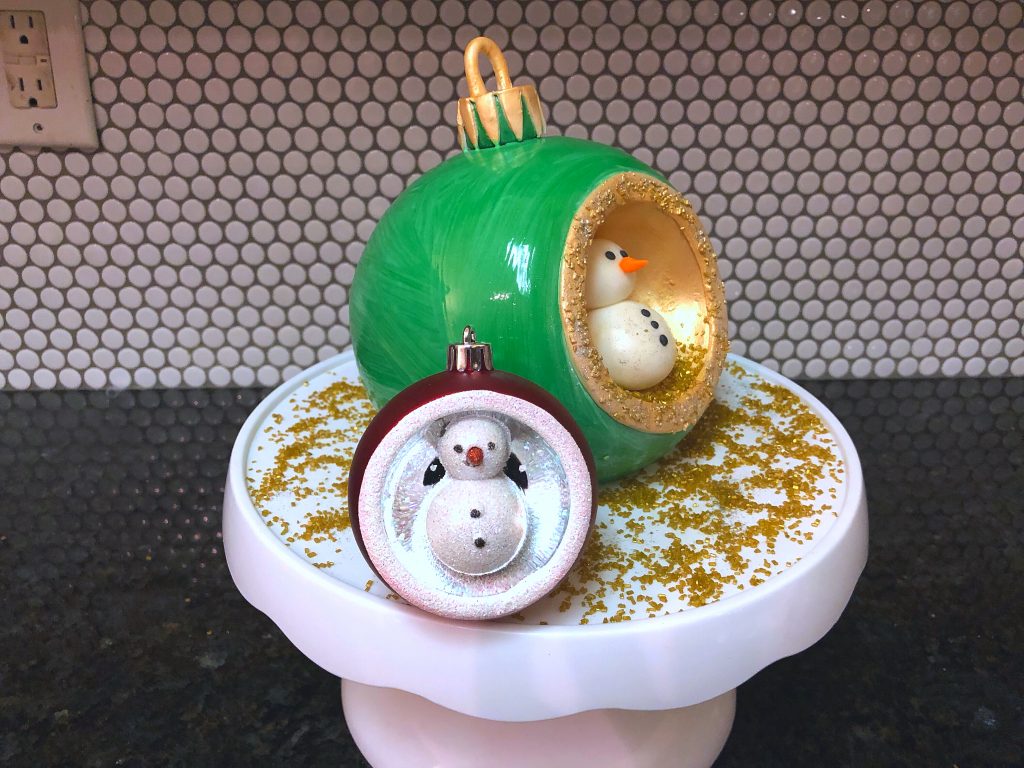
Now you will place the top half of the ball on top of the other half so that it now looks like a ball. Before crumb coating the cake, first decide on where you would like for the snowman to sit inside of the cake.
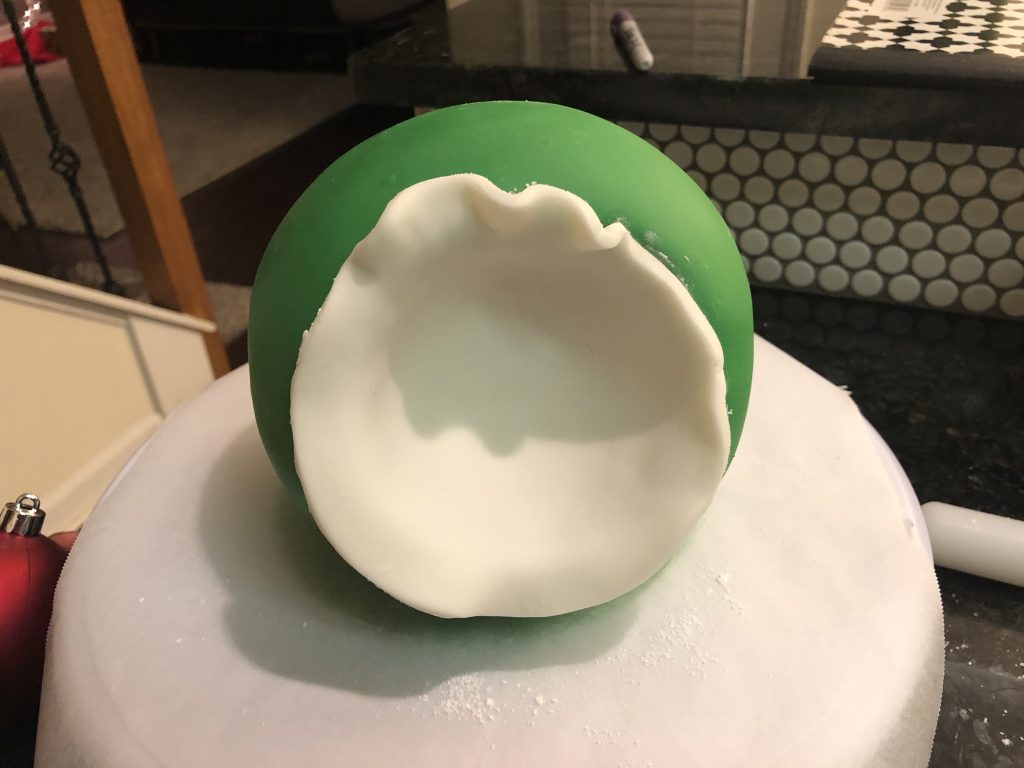
To do this, I used a 4 inch circle cookie cutter to press on to the cake as a way to section off the area that will be carved.
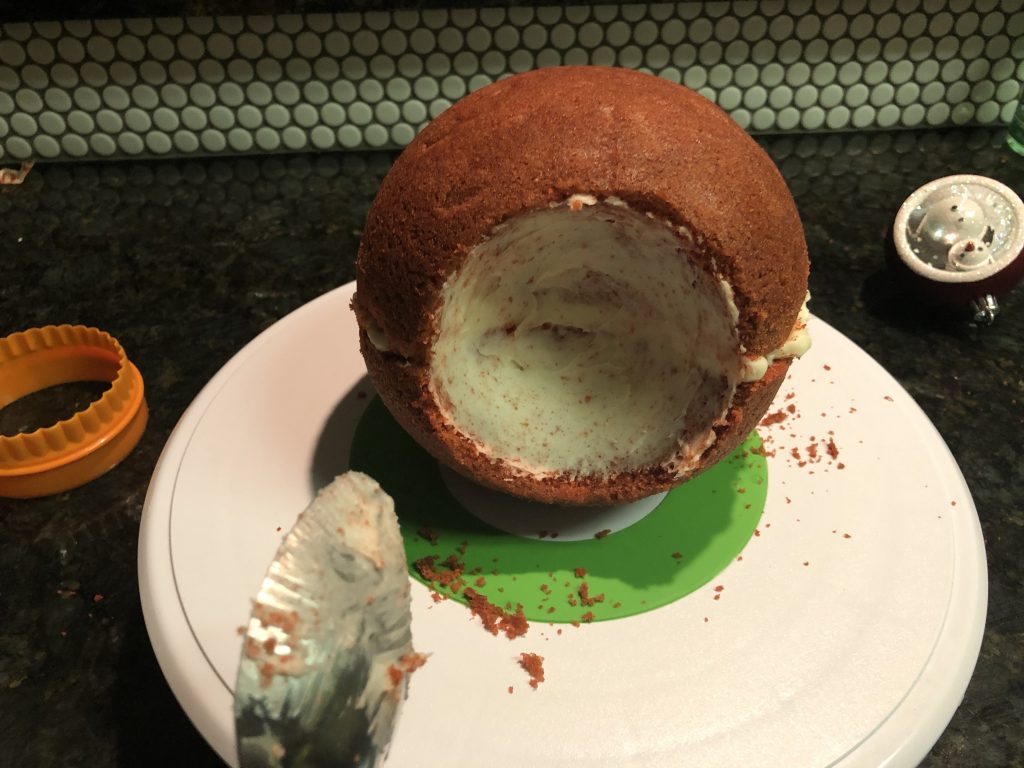
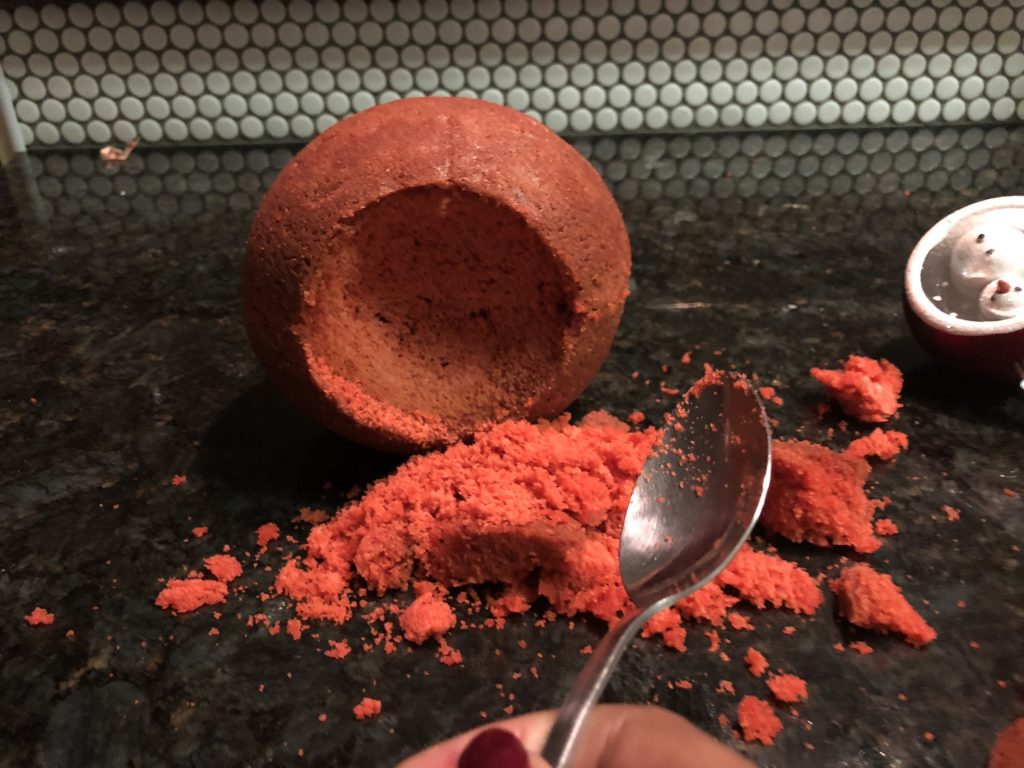
To carver inside of the cake, I decided to use a spoon to carve into the cake, while creating a smooth surface inside the cake at the same time. The line from the circle cookie cutter will help you to make a perfectly round cut because let’s face, I can’t draw or carve out a perfectly round circle to save my life. But I was able to do so using that cookie cutter.
Step 3. Covering the Exterior of the Cake.
This part can be a little tricky, but very simple at the same time. I have always had an issue with covering round cakes like soccer balls or anything similar to that shape because it’s so easy for the fondant to fold together at the bottom.
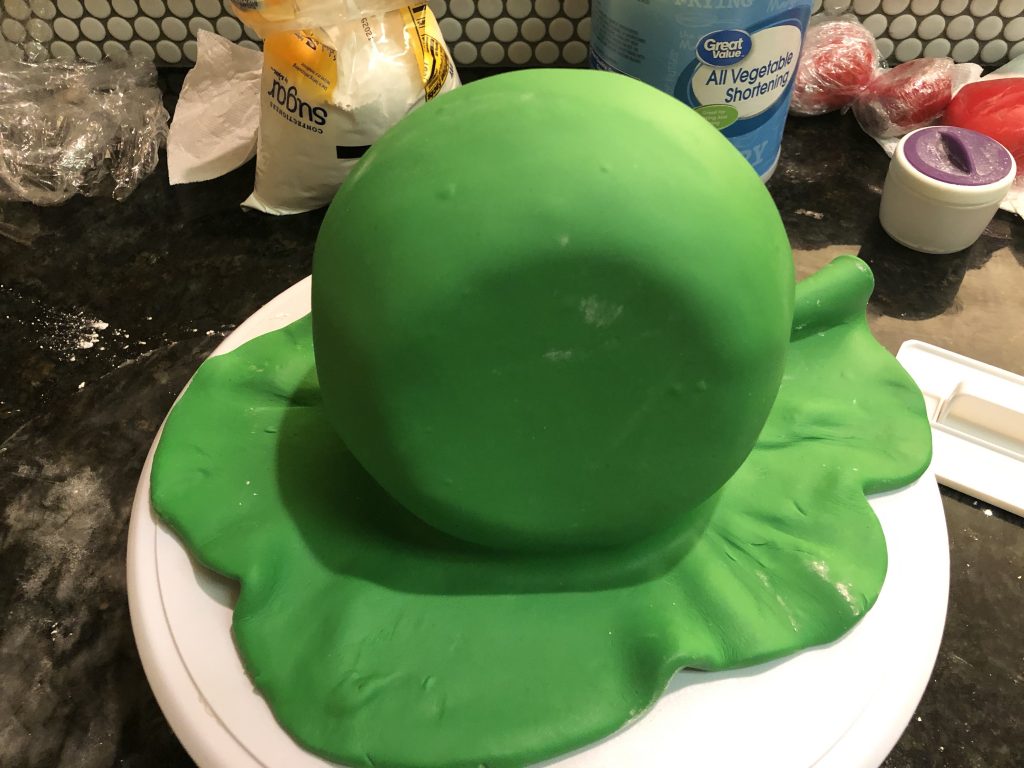
Therefore it’s best to constantly stretch and smooth out the fondant around the cake, each section at a time. Once you have reached the bottom of the cake, use the cake smoothers to smooth out the bottom while making a crater at the same time, which will gauge where you need to cut off the excess fondant.
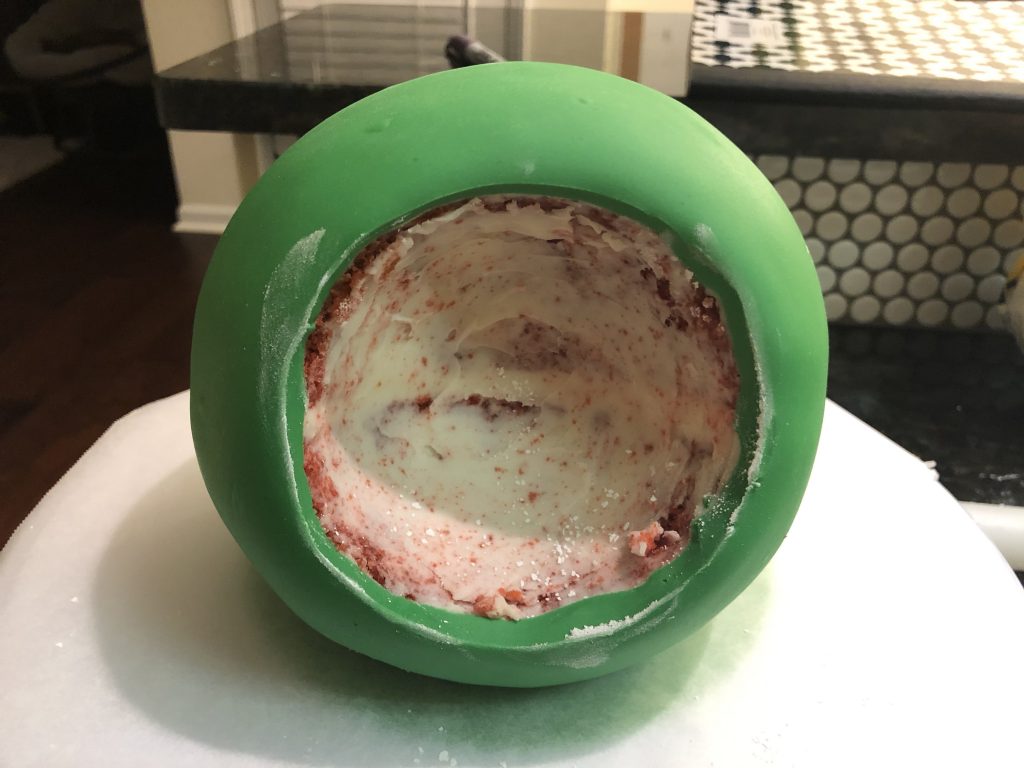
After cutting off the excess fondant, flip the cake over and fold the fondant onto the bottom of the cake so that the bottom looks completely round.
To add texture to the cake, began airbrushing the exterior of the cake with pearl airbrush paint. After the cake has been fully covered in shimmery pearl airbrush paint, I decided to try something a little different with the exterior of the cake. I lightly dabbed a paintbrush into water and began making brush strokes onto the exterior of the cake.
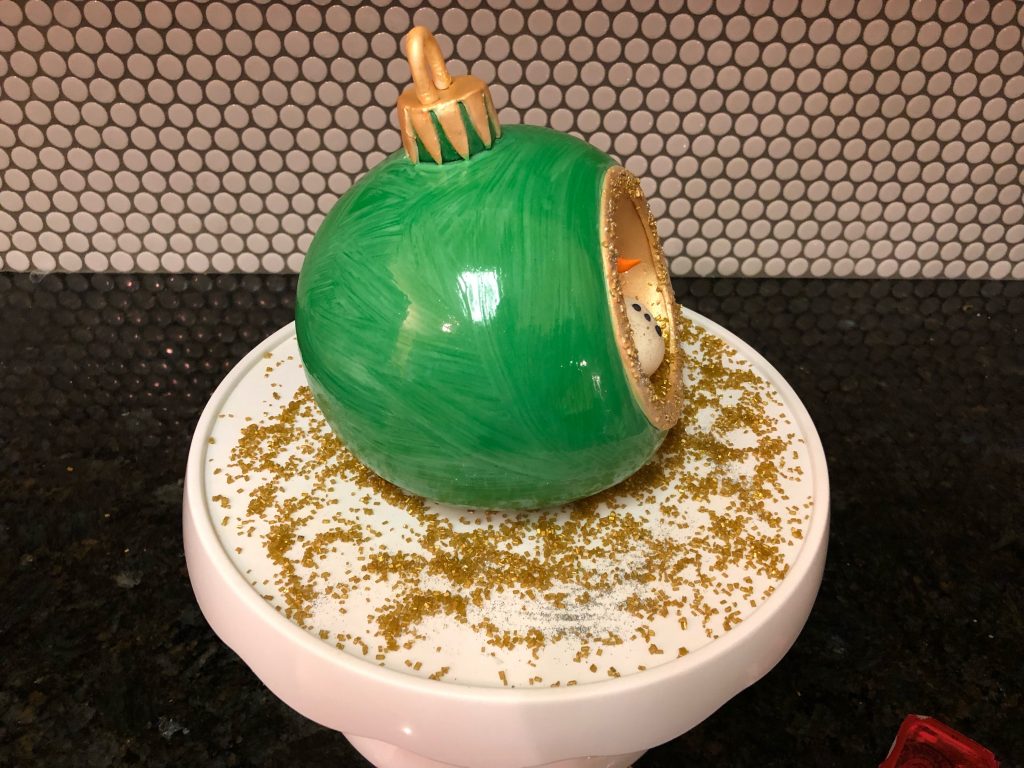
This technique came out very well, and I loved the fact that it gave the cake a glassy, hand painted look. However, if you would like to stick with the Airbrushed texture, then by any means please do so. I love trying new techniques, while making cakes because theres always a new cool and interesting way to create you own little masterpiece.
Step 4: Decorating the Cake
After painting the Exterior, I moved on to painting the inside of the Ornament gold with Edible Gold Metallic paint.
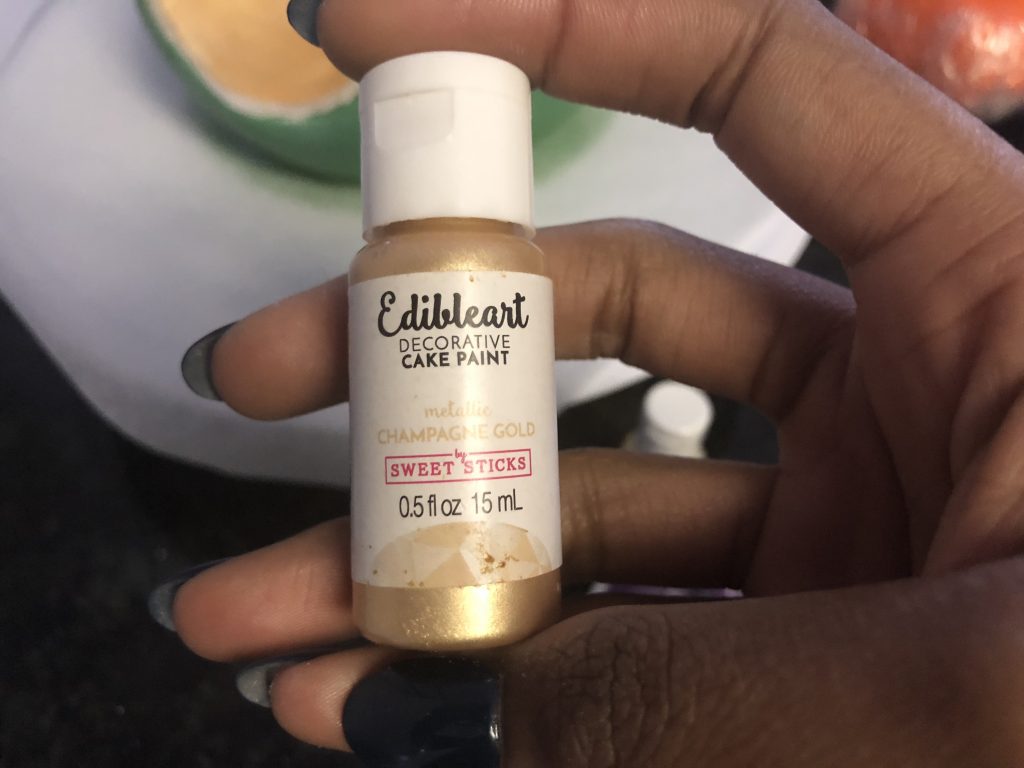
This paint is really simple and easy to use. The great thing about this paint is that it dries quickly and you only need one or two coats for full coverage.

After allowing the inside to dry, I placed a strip of white fondant around the edge of the place where the snowman will sit inside of the cake and began painting that gold as well.
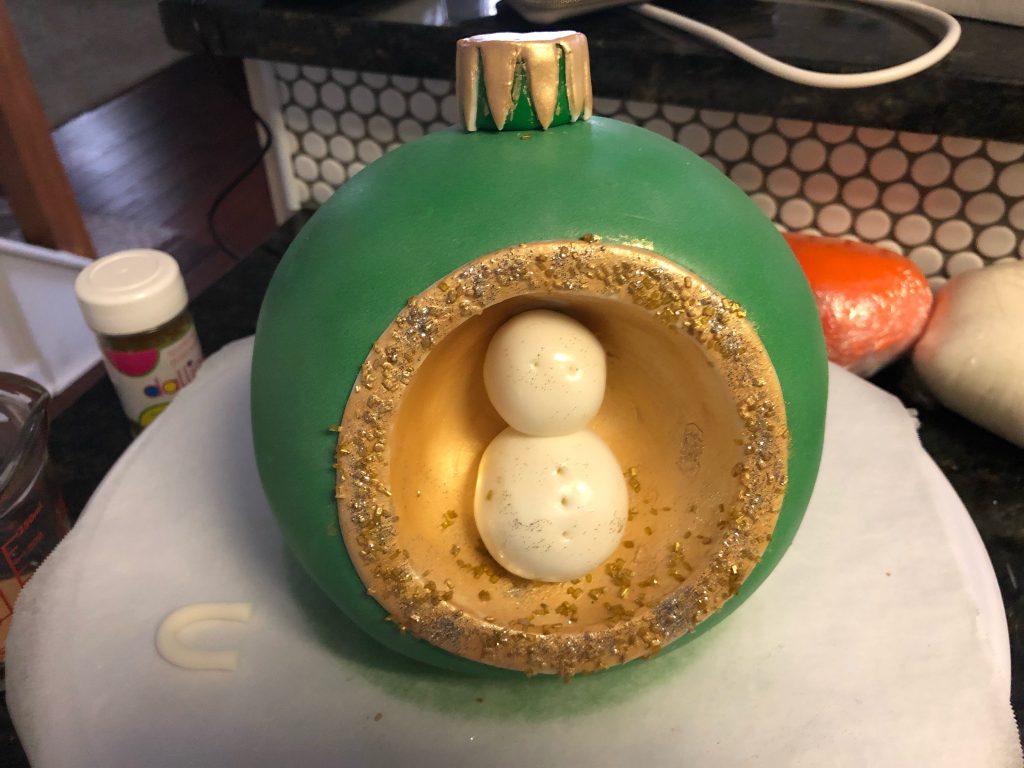
After the trim and inside of the cake has dried, I used a paint brush to apply the gold sprinkles and edible glitter. This helps to create that shimmery effect as the actual ornament.
After you have completely covered the trim with gold sugar sprinkles and edible glitter, you can now move on to making the snowman. To make the snowman, I rolled out the fondant to about an inch thick and cut out one small and one medium sized circle. After each circle is cut out, I used my hands to roll each circle into a ball for the head and body of the snowman. I placed each piece into the cake so that it was proportional as a snowman. Next, I rolled tiny pieces of black fondant into balls for the eyes and buttons of the snowman. Last but not least, I rolled a tiny piece of orange fondant into the shape of a carrot for the nose of the snowman.
Once the snowman was complete, I moved on to completing the hook for the ornament. The create the hook, roll out a piece of green fondant to an inch thick. Next, I used a small circle cutter to cut out a tiny circle. Once the circle has been cut apply it to the top of the cake. To make the hook cover, I used a sunflower cutter to cut out the gold cover for the top of the Ornament, in which the hook is connected to.
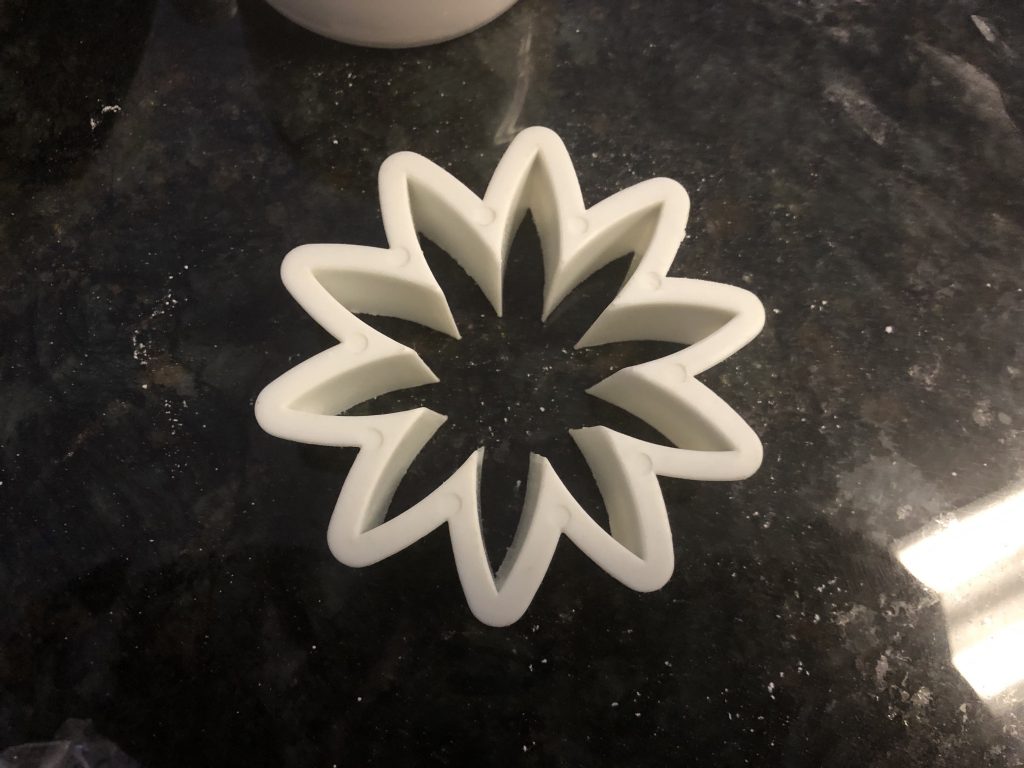
The sunflower cutter worked very well for providing the look that most ornaments have at the top of the hook. After placing the hook cover onto the green stem of the Ornament, you will now roll out a piece of fondant with your fingers and cut it and inch in length. Begin bending it so that it will look as if it were a hook after attaching it to the top part of the green stem and on top of the hook cover. After placing the hook to the cake, you can begin painting the hook and the hook cover gold allowing it to dry for 10-20 minutes.
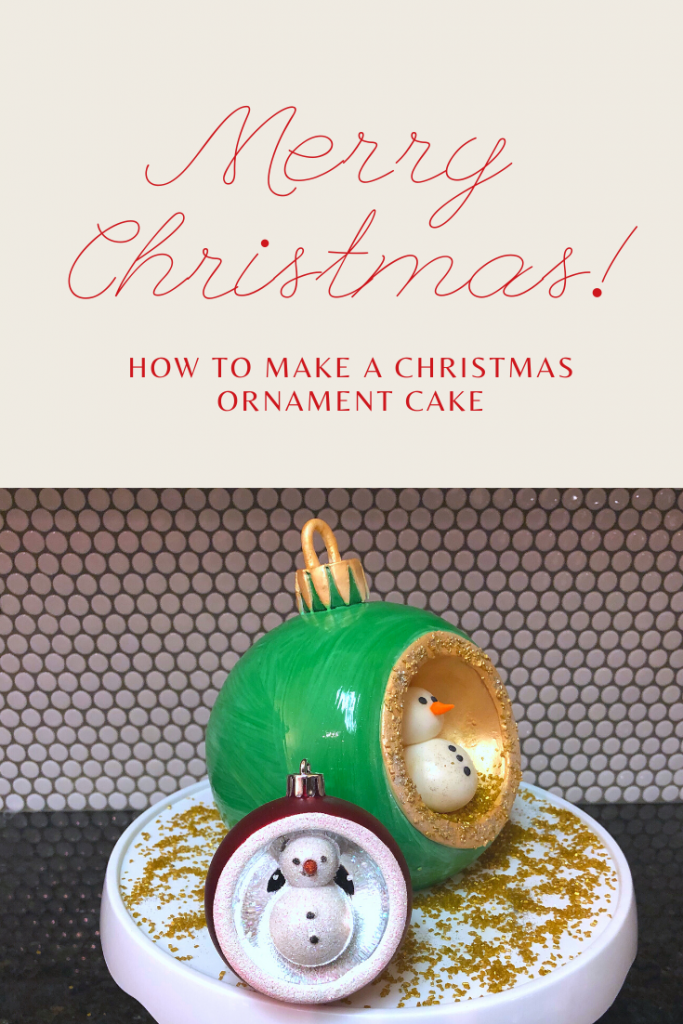
Woo Hoo!! That ornament cake is complete!
At this point, you can choose to add the finishing touches to your ornament cake. I decided to add more sugar sprinkles to the inside of my cake, while adding small amounts of edible glitter to the snowman and the trim of the cake. All of the things are completely optional so please do whatever makes your heart smile!
This projects is something you can do collectively as a family and it doesn’t require a lot of work. Plus it’s very cool to create an Ornament from your very own Christmas tree. It feels as if you’ve brought that ornament to life. Christmas is such a joyous time of year and I’m sure this project will bring much joy and laughter to your family and friends. Happy Holidays to you all and have a Happy New Year!